Have you noticed hairline cracks inside toilet bowl? This can be a worrisome view.
A cracked bowl makes you worry about your safety when using the toilet. There’s also the possibility of water infiltrating through those cracks and forming a pond on the bathroom floor.
The perspective of changing the toilet bowl is not too exciting, either.
In this post we will explain what causes hairline cracks inside toilet bowl and how you can fix them. We will also tell you when it’s better to change the toilet bowl.
What are hairline cracks inside toilet bowl?
![]()
Hairline cracks inside toilet bowl are very fine fissures that can be caused by a variety of factors. They can be present in a new toilet, too, due to impact.
The location and severity of these cracks will enable you to take the right action. You can either repair them or replace the toilet bowl altogether.
What causes hairline cracks inside toilet bowl?
When people notice hairline cracks inside toilet bowl, their first though it – someone has hit the object with force. However, this may not always be the case.
There can be multiple reasons why a toilet bowl is cracked:
- Impact
Impact is one of the most common causes of toilet bowl cracks.
The impact could have taken place during transportation, installation, or use. Any impact can cause a hairline crack in your toilet. It could be dropping a heavy object on the bowl or someone falling and hitting it on their way down.
Impact can also be caused by actions that seem inoffensive, such as slamming down a heavy toilet lid.
- Age
Porcelain objects can become more fragile with age. A toilet bowl should last as long as 50 years, but this duration is not guaranteed. You should regularly check your toilet for signs of wear and tear.
Age can represent a problem in older toilets, which were made from a combination of cement and other materials. Unlike porcelain, cement is prone to degradation. It shrinks in time and develops cracks as a result.
Having an old cement toilet that is cracked? Best is to replace it before it potentially breaks while you are sitting on it! [2]
- Over-tightening of bolts
DIY projects can save you a lot of money in plumbing bills, but they can also cause damage. A common cause of toilet bowl cracks is over-tightening the bolts that keep the toilet fixated on the floor. [3]
- Manufacturer defects
Even if new toilets are made from resistant porcelain, they are not perfect. A new toilet with hairline cracks has probably been manufactured using defective materials and/or processes.
- Drastic temperature changes
Avoid pouring boiling water in a toilet during winter. If the toilet is near an exterior wall, freezing pipes leading to the toilet could impact the porcelain.
How severe is the toilet bowl crack?
Not all toilet cracks are the same. All should be investigated and repaired, but some require more immediate attention. Here are some tips on how to assess the severity of toilet cracks:
- Where they are placed
A toilet bowl crack above the water level needs to be monitored. It is not an emergency as it will not leak. Take a photo for further reference and regularly check if the crack is growing.
A crack below the water level is harder to spot, but will most likely cause leaks.
Invisible cracks are the most difficult to observe. Indicators of this type of crack are standing water on the floor and missing water from bowl. Even if you don’t notice water on the floor, an invisible crack could leak directly into the drain.
- How deep the crack is
A crack that extends through the surface of the porcelain enabling water to leak out is definitely a big problem.
- How long the crack is
A longer crack is a more serious problem than a shorter one. Cracks wrapping around the bowl should definitely represent a concern for you.
- How old the toilet is
An old toilet that starts to develop cracks is a good candidate for replacement. Even if you use porcelain toilet repair kit, new crack will possibly appear again.
- What the plumber says
Sometimes a professional is the best person to decide how severe a crack is. The average person may see just a hairline fissure, but even these can cause serious leaks. If you are in doubt, ask a professional before deciding between repair and replacement.
Do the cracks in the toilet bowl cause problems?
The size and the width of the crack influence the right course of action.
Hairline cracks inside toilet bowl that do not cause leaks do not generally represent a problem.
On the other hand, you should not ignore longer and deeper cracks. Plumbers recommend replacement for cracks wider than 1/16 inches for toilet tanks. If you have the smallest crack in the toilet bowl, best is to replace it.
This is because the toilet bowl supports the weight of the tank and the person using it. If the toilet breaks while someone is using it, this accident can cause serious injury and damage.
How to fix hairline cracks inside toilet bowl

Have you decided to repair those hairline cracks?
Now it’s time to learn how to fix hairline crack in toilet bowl. Follow these simple steps and your toilet will be as good as new!
- Preparing materials
Gather the materials necessary for this job. You will need some old towels or washcloths for cleaning leaks and dirt. Prepare plumber’s putty or silicone sealant – depending on what you want to use to fix the crack.
- Preparing the toilet
You can’t just start fixing the toilet as it is. It’s preferable to wash the toilet before doing the repair.
Next, turn off the water supply to the toilet. Eliminate all water from the water tank and from the bowl. This can take some time, but it’s important.
You don’t necessarily have to empty the water tank, but it’s best if you do it. This is to prevent ruining your job in case you flush accidentally.
Dry the toilet bowl perfectly, both on the inside and the outside. You can accelerate the process with a blow dryer.
- Preparing the repair area
Clean the area around the crack carefully to make sure there is no debris on the porcelain surface. If you use epoxy, sand the area with sandpaper to make it rough. This way, the epoxy will adhere better to the toilet bowl.
- Fixing the cracks
Apply silicone sealant or plumber’s putty on the cracks.
If you use epoxy, mix the two parts of the epoxy (catalyst and resin) as instructed by the manufacturer. Use a putty knife to apply the epoxy to the crack. Flatten the epoxy to obtain the best aspect. [1]
Make sure you apply the epoxy within its working time, that is usually 30 minutes.
Wait the time recommended on the product’s instructions.
- Testing your repair
After following these steps, turn on the water supply and flush the toilet. If no water leaks, then you’ve done a good job. You have just fixed your toilet!
Can you use the same technique for toilet tank cracks?
Many users ask: how can you repair an American Standard toilet tank crack? Can you repair cracked porcelain toilet tank?
Sealing a crack on the toilet tank is just as easy as fixing a crack in the bowl.
You will also need to make sure the area you repair is perfectly dry and prepared.
Sealing a crack in the toilet tank is a better idea than repairing a toilet bowl. If a bowl breaks during use, the risks of injury are higher. The tank, on the other hand, needs to withstand less weight.
The same rule applies here: if the crack is wider than 1/16 inches, best is to replace the tank.
How to replace a toilet
Have you decided that best is to replace the toilet bowl altogether? Or the entire toilet, toilet tank included?
Sometimes, replacing the toilet can be the best option. The relatively low cost and effort of replacing a toilet are preferrable to an accident. If your toilet is in good condition, you can use it with peace of mind.
In order to enjoy a new toilet, here are the main steps you need to take:
- Choose the type of toilet
Some people want to change their toilet even if they only have hairline cracks inside toilet bowl. What happens is that elongated toilet bowls are becoming more fashionable and homeowners tend to prefer those.
Elongated toilets could be option too. You will find out which type of toilet suits your home and requirements better.
Since you are changing the toilet anyway, research comfort height vs. chair height toilet, too. Why not have a toilet that you will love using, every single time?
- Prepare materials
Replacing a toilet bowl is not a job to complete during your lunch break. Make sure you take plenty of time to handle this and prepare materials ahead.
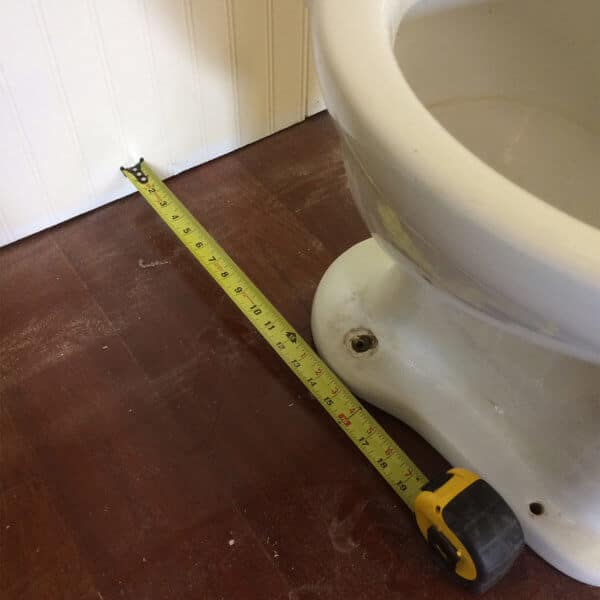
You will obviously need a new toilet bowl, toilet shims, wax ring, adjustable wrench, tongue-and-groove pliers, and a putty knife. A 2-foot level is necessary to make sure the toilet is level.
For the mess, prepare a bucket, a large sponge, and old towels. We recommend protection gloves, too.
- Drain the toilet
Turn off the toilet’s water supply valve. Flush the toilet to empty the toilet tank. Remove all water from toilet bowl using a mop and a sponge.
- Remove the old bowl
Using tongue-and-groove pliers, disconnect the water supply tube. Remove the plastic or porcelain caps that protect the floor bolts.
Remove the bolts using an adjustable wrench. If the nuts are rusted, cut them off with a hacksaw blade.
Lift the toilet off of the closet bolts, preferably with help from an assistant. Place the old toilet on old towels or newspapers to avoid staining your floor.
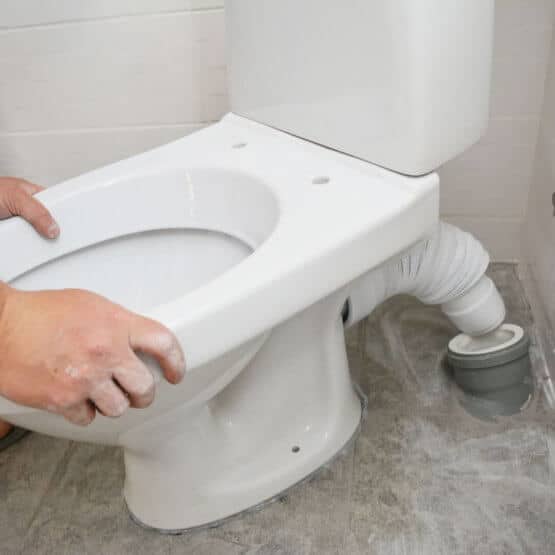
- Fit the new toilet
Temporarily place the new toilet on the flange and see if it fits. The closet bolts should align with the holes in the base. This is also the time to check if the new toilet is level. If not, add plastic or stainless-steel shims underneath it.
Carefully put the new toilet aside on a rug to avoid cracking or chipping it. Position it upside down so you avoid overturning it by accident.
- Apply the wax ring
Apply a new wax ring over the raised ring around the drain hole. Press it firmly until it is well seated. Don’t set the toilet down with the ring attached before final installation. Once the ring is placed on the floor, you cannot reuse it.
Some plumbers prefer foam gaskets, which are reusable and mess-free.
- Set the new toilet
Place the flange bolts into their corresponding slots. The threaded ends should be pointing straight up.
Lift the toilet and set it onto the closet flange. Slip the holes in the base over the flange bolts.
Apply gentle rocking pressure to push the toilet base down.
- Tighten the nuts
To avoid new hairline cracks inside toilet bowl, be careful not to overtighten the bolts.
Tighten the nuts gradually. Alternate from one side of the toilet to the other to ensure equal pressure on both sides. When done, cover the bolts with the plastic or porcelain caps.
- Test your new toilet
Connect the toilet to the water supply and tighten it with pliers. Turn the shutoff valve on and let the toilet tank fill.
Bottomline
Have you noticed hairline cracks inside toilet bowl?
These are small fissures in the material the toilet bowl is made of. Cracks can affect your toilet’s structure or not. We recommend to monitor them regularly and replace the toilet bowl if they become longer and/or wider.

Michael Davis is a heating & plumbing expert who currently works as independent contractor in SC. He also writes for Plumbertip.
For almost 10 years he worked on various plumbing tasks across South Carolina.