The toilet is one of the most important parts of a household. In fact, we don’t even understand how important it is until it stops working. When something goes faulty, it can help if you know how to DIY instead of calling a plumber. So, how to remove toilet flange, one of the components that can cause the most issues?
A toilet flange can commonly be found under the name ‘closet flange’. The name derives from the old word for the toilet, the ‘water closet’. This toilet component has two important duties: to keep the toilet attached to the floor and to connect the toilet bowl to the waterline.
However, just like all other toilet parts, the toilet flange needs replacing from time to time. Don’t call a professional just yet – here’s a quick guide on how to remove toilet flange!
When Should You Replace a Toilet Flange?
Before learning how to remove toilet flange, you should know when you need to replace it. Here are some of the telltale signs that you should consider changing toilet flange:
- A sewer or urine smell inside your bathroom can be an indication of a broken flange or a faulty wax seal.
- Your toilet rocks back and forth once you sit on it? This means your flange is likely broken!
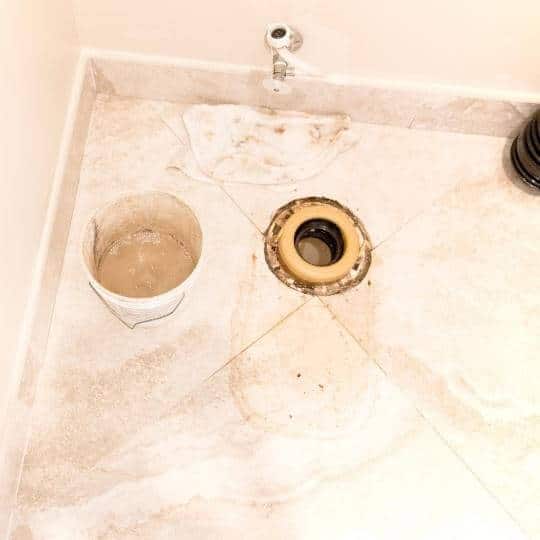
- If there is a pool of water around the toilet base, chances are the culprit is either a broken seal or a cracked toilet flange.
Any of these signs mean it’s time to check out your toilet flange and see whether it needs replacing.
While you might think it’s still too early to replace your toilet flange despite seeing these signs, think again. This is a common repair that will cost you only a few bucks if you do it by yourself, while a professional might charge you up to $200! And if you don’t replace it, you’re risking a lot.
A broken toilet flange causes severe leaks, that can result in many problems. This includes:
- Damaged flooring
- Development of mold and mildew
- Health problems
- Wastewater emitting
- Huge utility bills
All of this can be avoided by replacing your toilet flange on time.
How To Remove Toilet Flange – Step-by-Step Guide
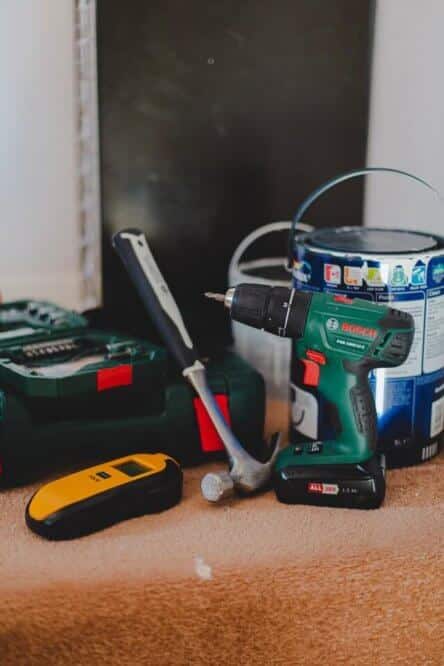
Once you’ve ensured your toilet flange needs replacing, it’s time you get onto it. While you can find a specialized toilet flange removal tool online, all you really need is:
- A sponge
- A screwdriver
- A putty knife
- Old newspaper or a piece of cloth
- A replacement flange
- A wrench
- A pipe cutter if you have PVC pipes
- A wax seal
- A strong friend to help you lift the bowl
Keep in mind that this is a process that you should plan ahead. It requires you to remove the toilet bowl altogether and cutting off the water supply to that entire bathroom. Because of this, you should always let other members of your household know in advance that you’re about to do this.
Here is the step-by-step process on how to remove toilet flange and to replace it with a new one:
Step 1
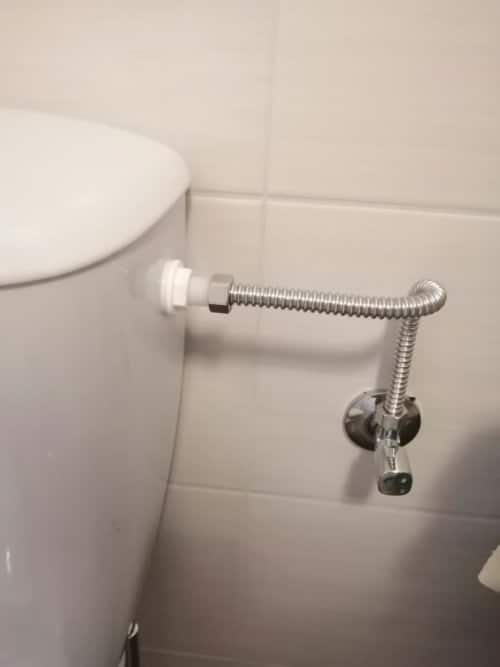
Before you do anything with your toilet, you should turn off the water valve and make sure the supply line is disconnected. Otherwise, you’re risking severe water damage. Empty the toilet bowl and tank by flushing repeatedly until there is no more water. You might need to sponge out excess water from the very bottom.
Once you’ve completed this, remove the bolts connecting the toilet and the flange by using an adjustable wrench. Remove the nuts from all sides of the toilets. This will disconnect it.
Keep in mind that the toilet bowl can be extremely heavy! Make sure you have a friend who can help you lift it safely.
Take notice that the material of the surface is essential in how easy this step will be.
For example, knowing how to remove toilet flange in concrete will serve you very little if you have a wood floor.
You might need to gently rock the toilet bowl back and forth to break a persistent wax seal before lifting it straight up. Once again, the level of difficulty might depend on the material of the floor and the type of your toilet bowl.
Step 2
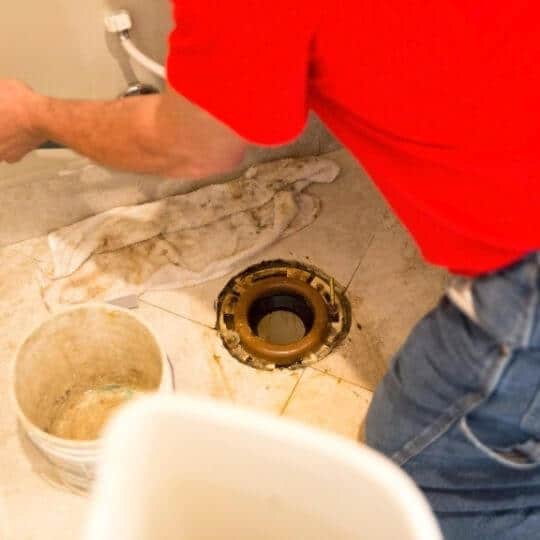
Once you’ve separated the flange and the toilet, it’s time to do some cleaning. You should get rid of all the excess wax on the flange. Use a putty knife to do so. Be careful where you put the removed wax! The best option would be to discard it on some old cloth or a newspaper you no longer need. The wax is very sticky, and it can make a huge mess if you just leave it on the floor.
Use another cloth you can live without to clean any remaining wax that the putty knife cannot clean. You can use it to clean the bottom of the toilet bowl, as well, since this part also tends to be dirty.
Step 3
Next, unscrew the flange from the pipe that connects everything with the sewers. Look at the screws you’ve removed. If they’re in a good condition, you can save them for later. If not, you might need to find replacement ones.
Depending on how old your toilet bowl is, unscrewing everything might be more challenging than you imagine it to be. You might even have to use a hammer or a chisel to remove some corroded bolts. If you find some really stubborn screws, cut them into pieces using a Dremel tool.
Remember to clean the area from the debris.
There are several types of materials the flange could be made of, and some leftover pieces might be sharp. You should always do your best to clean everything up.
Step 4
Now it’s time to look for the right flange for you. There are several types of toilet flanges, and you should pick the same one. The easiest option would be to take the old toilet flange, put it inside a plastic bag, then take it to the hardware store. Chances are the workers there will know which flange is the right one for your toilet.
You can also take a picture of the flange instead of bringing the flange itself. Just make sure the picture is clear and that every detail is visible, as this can help the workers identify the model and the size.
Another option is to measure the diameter of the pipe so you can pick the right size. Still, this can be tricky, as not all toilet flange models are the same, so you are still risking making the wrong choice.
Step 5
Once you’ve removed the damaged flange, it’s time to replace it with a new one. A good choice would be a tapered flange. You can easily attach this flange by inserting it into the drain, then twisting it.
Tapered flanges come with a rubber seal on the flange, which will secure the new flange in place.
Once again, it’s important to note that not all pipe and floor materials work the same. Sometimes, even though you, for example, know how to install a toilet flange on wood floor, this isn’t enough to help you install it on concrete. Still, a tapered flange should work well on most surfaces.
Tips On Removing the Toilet Flange
Keep in mind that there are still ways this process can go wrong. [1] Here are a few tips that can help you get the job done, sometimes even without removing the toilet flange itself:
- To remove a flange from a PVC pipe, you might need to cut the pipe using the pipe cutter. This can demand a longer process and more work, so consider giving a professional a call.
- Sometimes, the flange might have broken pieces. This can be fixed with a spanner flange. To do so, take the spanner flange and place it under the damaged one. Then, screw it quickly and as tight as possible. This will help you stabilize the existing flange.
- On certain occasions, you might only need to replace the collar. To do so, you’ll need a toilet flange repair ring. This item is designed to fit the flange collar. It’s made of very thin metal, and it will prevent leaks from the toilet.
- When removing severely damaged flange collars, use the old hammer and a chisel. These are the only tools you’ll likely need.
The Bottom Line
Not all people can brag about excelling in handiness skills. Fortunately, you don’t really need to in order to complete this simple task.
It isn’t difficult to learn how to remove toilet flange on your own, and it can save you hundreds of bucks. While we’re not against calling a professional, especially if you really doubt in your capabilities, it can help you if you try to complete this on your own.
We hope this guide has helped you learn something new, and that you’ve successfully managed to repair your broken toilet flange.

Michael Davis is a heating & plumbing expert who currently works as independent contractor in SC. He also writes for Plumbertip.
For almost 10 years he worked on various plumbing tasks across South Carolina.