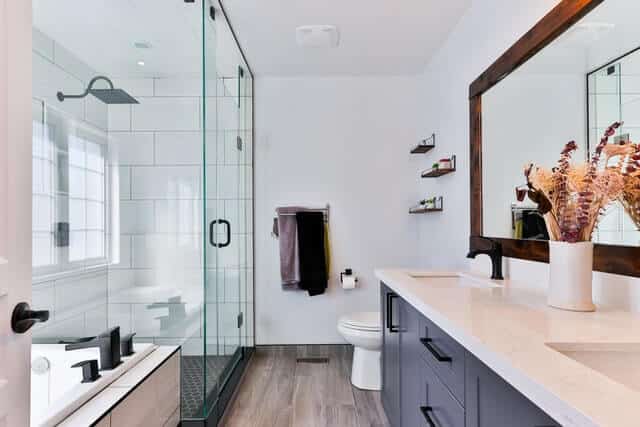
During the remodeling of the bathroom, people usually notice a gap between vanity and wall once everything is set in place.
This can be caused by improper measurements, longer vanity legs, or something similar.
Whatever it is, it naturally causes worry. However, you don’t need to think about purchasing another vanity just to have the one that fits properly.
We researched different ways you can fix this gap and gathered them all in this article. Read on, and you’ll find out about multiple ways to turn the annoying gap into a seamless fit.
Large Gap Between Vanity and Wall
Generally speaking, there should be no gap between the vanity and the wall.
This is the case, especially with the back wall. Smaller bathrooms might have a problem with a gap between a vanity and a side wall too.
Sometimes, there needs to be more space behind a vanity in order for the sink installation to fit in properly.
Whatever the case – when vanity is supposed to stand against the wall, the gap can create only problems, so we should strive to fix this.
For bathrooms, the problem of mold and bacteria growth is very common. A gap between a vanity and a wall creates a moist, dark environment, perfect for mold and bacterial growth. [1]
How to Measure a Gap Between Vanity and Wall

There are certain design standards when it comes to bathroom fixtures, and those should be followed for the best results.
However, there are sometimes exceptions, especially when it comes to new and creative designs of those fixtures.
Assuming you already noticed a gap between the vanity and the wall, your next step would be to take proper measurements of the gap. This is because the ways of fixing the gap will largely depend on the gap’s size.
To measure the gap, follow these next steps:
- Take a measuring tape and a piece of paper.
- Measure the width of the vanity. The plumbing standard of the width of the vanity is from 18’’ to 72’’.
- Then, measure the middle part of that width.
- Next, measure the depth of the vanity (from the wall to the front edge of the vanity). The plumbing standard for the depth of the vanity is 21’’.
- Then, measure the middle part of that depth. Where the two middle parts cross, there should be a center of your vanity.
- Measure the distance from the vanity center to the wall. This distance should be at least 15’’ by the plumbing standards.
- Finally, take a measurement from the gap to the wall.
It is common for people to notice this gap being anywhere from ¼ of an inch to 3 inches or more. The 3-inch gap between vanity and wall won’t be fixed with the same methods as the one that is a quarter of an inch.
Taking proper measurements is important so you can prevent low water pressure after plumbing repair.
How to Fill Gap Between Vanity and Wall
First, it’s important to identify where the gap is. It could be in one or two places:
- Between a Vanity and a Back Wall
- Between a Vanity and a Side Wall
It’s not impossible that the gap appears on both sides. However, the gap is more likely to be either on one or the other side of the wall.
Either way, we’re going to give you a couple of solutions for both of these problems.
We’re also going to disclose which of these steps are made for smaller gaps and which are better to use on larger gaps. So let’s get started.
Different Ways to Fill Gap Between Vanity and Wall
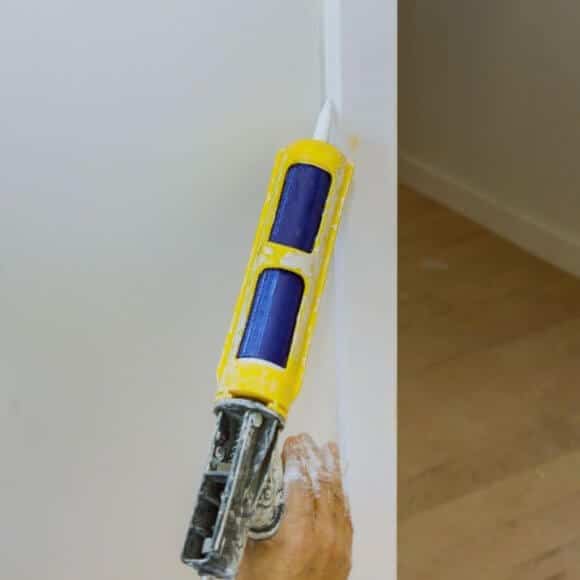
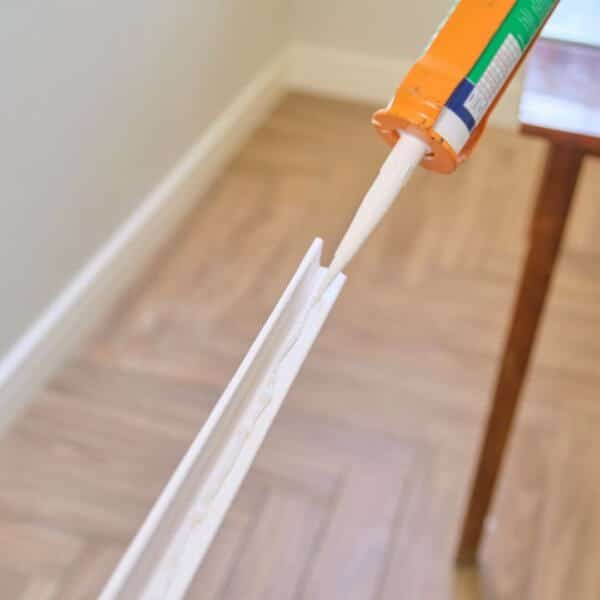
- Caulking
One of the most popular and simplest ways to cover small gaps is by using caulk.
There are plenty of options when it comes to caulking only, but the smartest option would be to choose the caulk based on the environment.
Since the gap being filled is inside the bathroom, there will be a lot of splashing of the water and steam. Water can get onto the caulking that you place to fill in the gap.
For that reason, it’s best to choose waterproof caulk options such as silicone. A silicone caulking gun can be transparent or as a white paste.
It can be used on a number of different surfaces, such as marble, glass, ceramics, etc. [2]
You should just be careful as some of the silicone caulking guns can’t be used on wood or painted surfaces. [3]
If you have a wooden or painted vanity, then choose the waterproof caulk safe for wood.
The caulking is easily applied by a caulking gun. Just apply a thin line of caulk to cover the gap. After that, pick up a damp cloth and smooth the caulking before it’s dried.
- Backer Rod
If the gap between the vanity and the wall is too big to be covered just by the caulking, then use a backer rod.
A backer rod is a type of flexible foam used in order to create support for the sealant used to close gaps. There are also different types of backer rods that you can use. [4]
That (of course) includes different sizes of backer rods to choose from. This is why taking measurements as we described before is just as crucial.
When a backer rod is applied in order to fill in the gap, it gets covered with a sealant afterward. It is also compatible with most sealants or caulking, including silicone ones.
After a backer rod is placed and covered with caulk, the caulking should form an hourglass shape and stay in place. The final step is just smoothing down the caulking with a damp cloth, as you usually would with caulk.
- Tiles
Now, if a gap is between a vanity and a side wall, you might want to use this trick instead.
Apply the tiles from the edge of the vanity and above its surface onto the side wall. This will cover the gap on the side of the vanity, and you won’t need to worry about choosing the proper caulking for filling it.
The important part of this trick is that the tiles need to be applied only to the upper part of the wall. There should be no tiles on the lower edge because this is where your vanity should meet the wall.
- Backsplash
The backsplash trick is similar to applying tiles, only it’s used more often for closing the gap between the vanity and the back wall.
We often see the backsplash used and applied in the kitchen because that wall can also face a lot of splashes during cooking.
For bathrooms, a backsplash can also be used in order to both protect the wall from splashes and cover the gap between the wall and vanity.
There are many types of backsplash materials to choose from – porcelain, ceramic, pebble, marble, and more. [5]
You can choose the backsplash color that complements the vanity, so you get the most out of it aesthetically as well!
- Shelves
This is yet another trick that works best for closing the gap between the vanity and the side wall.
Adding shelves on the side is a perfect way to create some functionality while also fixing the problem with the gap.
You can also experiment and install side cabinets instead. What you install on the side of the vanity will largely depend on the amount of space you have.
If, in the end, it turns out you still have a bit of a gap on the side of the vanity, it’s still not a problem. A smaller gap is easily sealed with just a little caulking.
- Filler Strips
Finally, this solution is actually created specifically to tackle the problem of gaps between vanity and walls.
Nowadays, it is actually possible to buy the vanity filler strips, which are attached to the vanity and cover up the gap completely.
Even with the case of unusual shapes of vanities (e.g., vintage ones), you can still find places that will tailor the filler gaps for your vanity.
Since using the filler strip is a process by itself, let’s explain that next.
Fill Gap Between Vanity and Wall Using Vanity Filler Strips
The next steps we’re going to explain apply mainly to fix the gap between wooden cabinets/vanities and the wall.
If your vanity is made out of some other material, it’s either best to buy a filler strip or try out other tricks mentioned above.
Also, if you’re in the process of remodeling your home, you might want to check out the bath fitters and their cost.
These can save you some time and money during bathroom remodeling.
Materials For Applying Vanity Filler Strip
Before you start attaching the filler strips onto your vanity or cabinet, make sure you have all the tools you need.
You’ll need to measure, try out the measurements, cut the wood into a filler strip, and then attach it.
Materials you will need for making and applying a filler strip are:
- Measuring tape. Take all the necessary measurements at least 2-3 times. Measure the width and depth of the vanity, as well as the gap itself (as explained earlier in the article).
- A piece of paper and a pencil. This one is a no-brainer – you’ll need it to mark the areas to cut and also to write down all the measurements.
- You’ll need just a piece of the usual plain cardboard in order to help you map out the measurements before cutting.
- A piece of wood. This piece should be as close as to the one the vanity is made of. You can easily paint over it once you’re done cutting.
- Belt Sander. The wooden edges can be quite rough and tough to fit in when cut with a saw. That’s when you’ll use a belt sander in order to file down and smooth out the wooden edges.
- There are many types of saws out there – just use the one you’re comfortable with.
- Silicone Caulk or Wood Glue. As we briefly mentioned previously, you’re going to use caulking based on the material.
- Screws and a Drill. Depending on how large the gap and the filler strip are, you might want to attach it also by screwing it to the vanity.
How to Apply Vanity Filler Strip
- Take Measurements of The Gap Again. This time, mark the measurements of the gap by using a piece of cardboard to map out the place for a filler strip.
- Cut the Cardboard. Then, as precisely as you can, cut the cardboard to make a sample of the filler strip. Try out this piece of cardboard in the gap of the vanity. Perfect the cardboard sample until it fits perfectly.
- Saw the Wood Using Cardboard as a Reference Model. When you are done with perfecting the cardboard sample, use it as a model for measurements to cut the wood to.
- Refine the Filler Strip. After you’ve cut the wood in the shape of a filler strip, use a belt sander to smooth out the wood.
- Attach the Filler Strip. Then, use an adhesive or caulking to attach a filler strip. If a filler strip is of a larger size, you might want to screw it in the side of the vanity in order to secure it further.
FAQ
Should Vanity Stand Against the Wall?
Yes. In most cases, this allows for the ease of installation and additional repair. It’s best to take measurements beforehand so you can install the vanity without any gaps.
And if you want to take your plumbing measurements to the next level, check out rough-in costs.
What Size of Gap Can Caulking Cover?
You can cover the gaps ¼ of an inch only by using the caulking gun. For bigger gaps, insert a backer rod before any type of sealant in order to fill in the space.
What are the Plumbing Standards for Vanities?
The standard distance from the center of your vanity should be at least 15’’. The width of the vanity should be from 18’’ to 72’’, and the depth of the vanity should be 21’’.

Michael Davis is a heating & plumbing expert who currently works as independent contractor in SC. He also writes for Plumbertip.
For almost 10 years he worked on various plumbing tasks across South Carolina.