We all know that the construction process means business. If you have set out the mission to build a home, work as a plumbing contractor or work in real estate, you should know how much does it cost to rough in plumbing for a bathroom, right?
In a nutshell, plumbing involves setting up all water supply and drainage pipes according to the expectations.
This process will involve setting up ensuring all the equipment gets installed. This process will be rough in plumbing, followed by finish plumbing, which gives the place a desirable look. As much as the equipment is installed, you will find the area beautiful and desirable to the end-user. Finally, it involves tiling the ground and even walls to build a bathroom.
This article looks in detail at the cost of rough-in plumbing for a bathroom.
How much does it cost to rough in plumbing for a bathroom?
To understand the cost of rough-in plumbing a bathroom, we will need to evaluate the rough-in exercise process. First, you will have to prepare the drain lines and plumbing pipes for bathroom fixture connections.
This process gets done while setting up a new bathroom or converting the old-fashioned bathroom places into modern bathrooms.
The traditional bathrooms don’t have a plumbing system installed. Modern bathrooms come with flushable toilets and current hot water bath systems. You will need excellent plumbing tools and an experienced plumbing specialist to make all these modern fixtures functional and draining perfectly.
What do you need to get your rough in bathroom plumbing right?
Rough-in plumbing will not get a perfect job if done in a hurry. You will need a proper breakdown of the activities involved in setting up these pipes and drain lines.
The cold and hot water pipes need to be perfectly set to deliver the desired outcome. This process we will discuss below will help you set up your bathroom’s rough-in plumbing in the best way.
Step one- Map your project site.
You will need to represent your desired bathroom layout on a map. Then locate the closest drainage stack.
From there, draw the path that most suits your drain and water supply pipes to get to the bathroom. Then, draw the locations these pipes will take in the bathroom. While drawing the location of the pipes, you need to consider the positions of the following fixtures.
- Bath/shower location
- Bathroom sink
- Toilet
- Bathroom tub or Jacuzzi
When developing a map, you may use a pencil and sketch the bathroom as you need it to come out. To work as an expert, consider including the sizes of these pipes for an easy installation process. [1]
Step two- Create and install your T-connection
The first step in actualizing your map idea will be to install a T-connector to the sewer stack. Use a pipe T-connecter to install the T-connector to the stack.
The branch drainage that this connector creates will carry wastewater from the toilet, sink, tub, and any other water fixture in your bathroom. It will then drain this wastewater to the main drainage.
To open the main stack, use a big cutter for effective cutting. Make a 3-inch opening and insert the T-connector at this opening.
Ensure that the connection point remains at a level equivalent to the bathroom floor. In this scenario, water will flow downhill to the connector. Since you will use a PVC connector, use cement and PVC cleaner to clean the pipes after connection.
You will have achieved a significant milestone in creating your rough in bathroom plumbing in this stage. The manufacture PVC cleaner and cement cleaner instructions serve as a guide in achieving the cleanest installation.
Step three- Connecting the toilet drainage.
You will now need to connect your toilet drainage to the main stack’s new set T-connected zone. Insert a 3-inch diameter pipe to run to the exact location of the toilet drainage. With a 90 degree turn, this pipe will go upwards to reach a level just below the toilet floor. Using two female adapters, connect the pipes.
Use an elbow to make another 90-degree turn and place the pipe horizontally again. Now split the pipe with a pipe splitter, and you get two pipes for various fixture insertions.
Ensure that you use PVC-friendly cement when the pipe connections. Any other type of cement might cause damage to the pipes.
Step four- Installing the sink drainage.
The pipe you split into halves will be vital at this point. To install the sink drainage, fix a 2 to three inches adapter to a 3-inch diameter installed on one of the split pipes you created in step two. Next, run a 2 inches PVC pipe to reach the location of the sink installation.
Let the pipe turn upwards at a 90-degree angle. Next, install a 2 inches diameter pipe and let it go up to a length of 18 inches above the flow. This 18 inches pipe will serve as the drainage pipe for your sink.
Step five- Installing the toilet drainage.
Take a three inches diameter pipe and split it into two. With a 90 degree angle, let your split pipes join with one end going upward to the toilet location.
The flange of the toilet goes next. Install it above the flow to mark the location of your toilet. With the flange installation being complete, your toilet drainage installation has gotten completed and ready.
Step six- Tub/shower drain installation
Let a 3 inches diameter pipe run to the tower and tub locations. In some bathrooms, you will only use the shower without the tub. In this scenario, let the pipe run to the shower location. You may use an elbow to turn the pipe 90 degrees upward.
Run a three-inch diameter pipe on the pipe’s flow to serve as the tub or shower drainage. You should ensure you connect the pipes as required. With the tub or shower drain in place, your installation gets completed successfully.
Plumbing installation cost calculator
As a plumber, you will agree that this job may turn out more challenging than expected. To make the work profitable while ensuring your customer’s satisfaction, you will need an installation calculator. Don’t worry about the new term because we will break it down further for your complete understanding.
What is a plumbing installation cost calculator?
This plumbing installation cost calculator refers to a technique of evaluating the overall cost required to complete a particular plumbing job. Of course, every plumbing need, like installing sewer lines, repairing pipes, or re-piping a home, comes with its own cost.
So, while creating an estimated installation cost, checking the standard charges for particular plumbing services proves an essential part.
So, you will need to create the perfect cost installation calculator to help your clients plan on their financial spending.
This cost calculator includes charges for each service you will deliver. For instance, we may estimate the plumbing to cost up to $800 with minimal cases of fixture failures. A smooth operation will require this budget to complete. [2]
What does a good plumbing installation calculator contain?
The factors you need to consider to create the perfect cost calculator for your rough-in plumbing include:
First, give out your hourly rate.
This base rate applies to all plumbing specialists globally. Since you get to know your worth as a specialist, you may divide it according to the days your project might take. This way, you get to narrow it down to your standard hourly rate. Depending on your profit margin, an hour you work will get to be an hour you earn.
After developing your base hourly rate, you will stand a chance to go on and create your estimates.
Break down the project cost
Rough-in bathroom plumbing will involve using pipes, T-connector, cement, PVC pipe cleaners, and other associated tools.
Depending your bathroom size you need to rough-in, you will understand the necessary materials. Next, break down the cost for all these equipment and determine the overall cost.
Total hours estimation.
Every project has a timeline. To develop ideal labor hours, you might consider writing down a timetable. This timetable will help you allocate specific time frames to particular tasks.
After you have broken down all the working periods, combine all the operating hours to estimate the hours it will take to complete rough-in plumbing your bathroom.
If you multiply the hours’ estimation to your hourly rate, you should get a figure close to your service cost.
Calculating your total estimate
The total estimate will help the client allocate finances to guarantee your project completion. To get this total estimate, add up the figures you got in 2 to the figure you get after multiplying 1 and 3. This sum will give you the total cost estimate. That is:
Project cost + (hourly rate X total hours)
While giving the total estimate, it will look professional to attach the details of your cost estimations. This estimation software might help you get the cost estimates for bigger projects.
For instance, you may get tasked with rough-in plumbing a variety of houses for a real estate customer. You will need to get your figures right to avoid losses, especially if you run a plumbing company.
Knowing these costs will help you stay ahead of all financial plans and save for more projects as a house owner.
The table below summarizes the rough-in plumbing cost estimation calculator for small and large areas.
| Cost estimation calculator for a small project like leak repairs and toilet repair | Cost estimation calculator for large projects like rough in bathroom plumbing and slab leak repair |
| It takes a financial budget of between $125 to $350 | It may take a budget of $500 to $800 |
| Finding out your project rate since it will take a short duration | You will need to calculate your hourly rate and the total hours expected to complete the project |
| Calculate the cost of purchasing equipment for repair | Give out the total project cost |
| Quote your total cost | Calculate the total project cost estimate |
| Present the customer with the final cost | Present the customer with the cost estimate and breakdown of the components of your cost estimation calculator. |
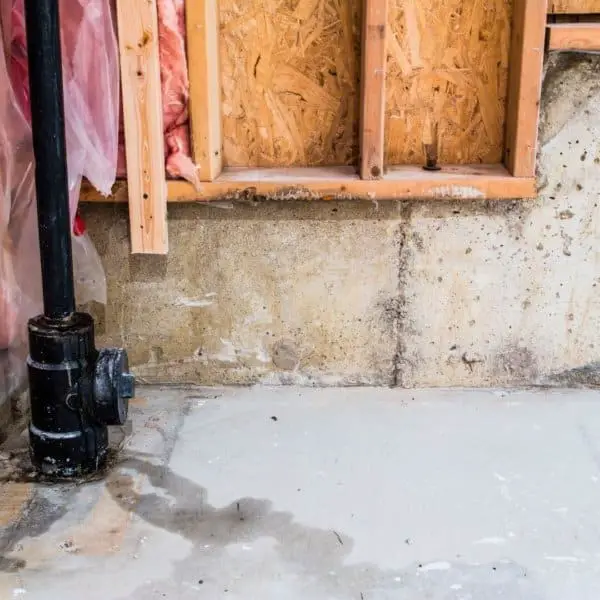
Can you put a bathroom in the basement without rough-in?
Are you considering having a bathroom in your basement and wondering if you need to rough-in plumb? To answer you, will the bathroom be in a new or old house? In a new home, rough-in plumbing may get done in the way we elaborated above.
So, let’s look at the rough-in plumbing possibility for a bathroom in an old home’s basement. This idea will seem appealing to many people.
The bathroom will be ideal, especially if you love spending more time in the basement. It may be an extra space for visitors often and if you want to upgrade your current house status.
So, how will you go about the drainage of the shower and toilet water in the basement bathroom? Can you put a bathroom in the basement without rough-in plumbing? I will say that you need an advanced kind of plumbing to make the bathroom idea a reality.
You may not do rough-in plumbing like in other upper rooms, especially when the main drain pipes run on a higher level.
The following tips will guide you in draining your basement’s bathroom wastewater.
- Create a sewage drain under the tiles of your basement bathroom that connects to the main drainage pipe.
- Focus on investing in a sewage ejection plumbing system.
- Install a special line at your bathroom slab called a sump hole.
- The sump hole will use its macerating system to shred and grind tissue paper from the toilet. After shredding, the wastewater and water from the reservoir will aid in pushing out the waste to the main sewer line upon flushing. The wastewater will go through the pipe connected to the main sewer.
So, yes, you may put a bathroom in the basement without rough-in plumbing, but have this unique drainage set up to make your wastewater sorted. But, of course, you don’t want to have a flooding bathroom in your basement.
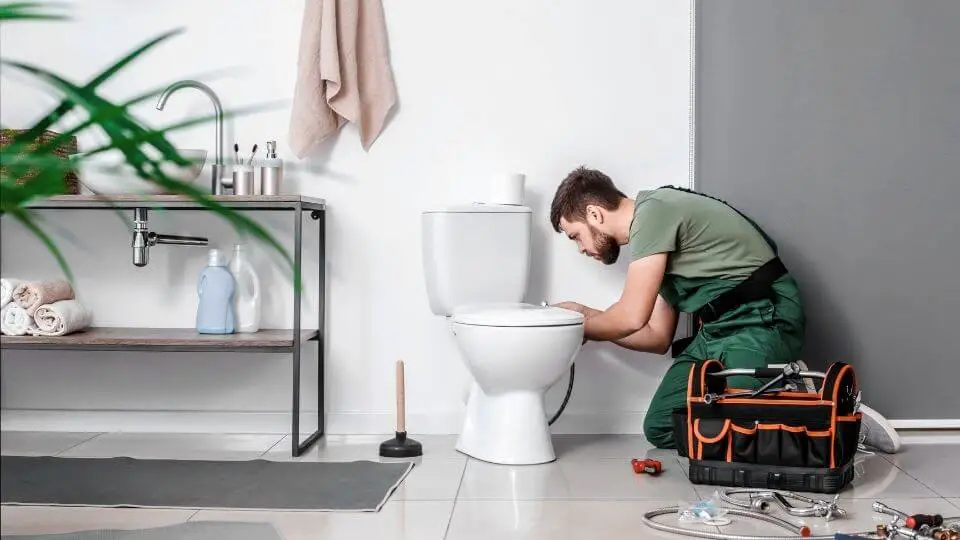
What you need to know about toilets and bathroom rough-in plumbing
![]()
Bathroom rough-in will involve various areas in the bathroom. You will deal with sink rough-in, toilet rough-in, and shower rough-in.
The toilet rough in proves a critical plumbing area, and some tips might help you navigate small and large projects. What do you need to understand to make the toilet installation fit perfectly?
Get your measurements right.
In all plumbing and construction processes, take note of the measurements part. A small measurement mistake might cost you a lot. For example, imagine setting up a toilet rough in only to find out that the toilet size you have will not fit in. Or even getting leak on toilet base everytime you flush it.
It will seem both unprofessional and embarrassing for a plumbing specialist. So, it would be best to do plumbing, considering the toilet sizes out there. The standard sizes we have in the market include the 10, 12, and 14 inches toilets.
Ensure you place the toilet at a specific location depending on your customer’s needs.
Go by your customer’s specifications.
You may situate the toilet rough in space anywhere from the center, back left, and right of the bathroom. Some customers will love it at the center, others on the right or left.
You need to take note of your client’s position and note down per your estimated time in your budget if you charge per hour. Some places like the central location may take more time, increasing your overall hours spend on the job.
Be aware of the bathroom location.
As we have seen, rough-in plumbing will be different for different bathrooms depending on the location. It will prove more challenging to do rough-in plumbing for a basement bathroom than other house areas.
You will need to consider all the tricky bathroom rough-in plumbing requirements. You need to do the best job for a plumbing system to come out successful.
Sometimes you may complete a plumbing task to find the basement bathroom sink clogged due to poor rough-in plumbing.
Do you need a permit for bathroom rough in plumbing?
Yes, you will need one, depending on what you need to be done. For the case of new bathrooms that will involve dealing with the main sewer, you will need one.
Every state in the US and other cities and remote places has rules regarding the plumbing process. The plumbing contractor and the homeowner need to be on the same page with these rules.
Those contractors dealing with plumbing without permits may put a customer in trouble while charging a lot of money and end up messing up a plumbing system. Plumbing may link more than two homes, and these rules help prevent massive plumbing issues for a larger community.
You will also need to find a licensed plumber to help you conduct major plumbing like adding a new bathroom to your home. Adding pipes to the main sewer should not be a DIY affair.
What are the benefits of getting state permits when doing bathroom rough in plumbing?
![]()
Bathroom rough-in plumbing will be where pipes get added and installed to the main sewer lines. By securing a permit, you will stand to enjoy the following benefits.
- You will attract professional plumbers who know their job perfectly. You don’t imagine messing with a plumbing system that gets relied upon by other homes too. You may find yourself guilty and answerable to the law. Any property damage that may occur if the main sewer line gets messed up might be solely on you.
- You will get excellent plumbing service that will guarantee you happy home times.
- It will give you peace knowing that professionals handle your plumbing.
- A permit attracts professional contractors your way who help you with the technical permit requirements.
Which are the best pipes for rough-in plumbing in your bathroom?
In plumbing, pipes make the main topic. You will need the best type of pipe to make the best plumbing procedure. For instance, you will need the best pipes when it comes to bathroom rough-in plumbing in the basement or other high bathrooms.
We recommend both CPVC and PVC pipes in this case. Plastic pipes prove ideal in the plumbing sector in current times. Before highlighting their benefits, let’s discuss why PVC and CPVC pipes.
CPVC pipes will be the best to use in rough-in plumbing for the shower system. The shower system will require both hot and cold water supplies. This pipe will be applicable for the sink and toilet too.
CPV will be perfect for connecting at the final rough-in plumbing exercise. PVC pipes will withstand high temperatures without a problem.
For the connection from the T-connector, you may use the PVC pipes. This connection is because PVC pipe will work best and proves durable.
What are the benefits of having plastic pipes for rough-in plumbing?
- Plastic pipes may not quickly freeze during winter in cold regions. Therefore, you will be safe from constant clogging caused by frozen water inside the pipes.
- CPVC pipes will withstand high water temperatures. People had this constant fear that plastic pipes could burn out when exposed to water under high temperatures. Now, with CPVC pipes, you will get hot, warm, and cold water in your shower, sink, and even toilet.
- Plastic pipes will also last long like other metal pipes. Currently, Plastic pipes like PVC and CPVC will last up to 80 to 100 years. Therefore, it would be best to use them without fear of immature plumbing breakdown.
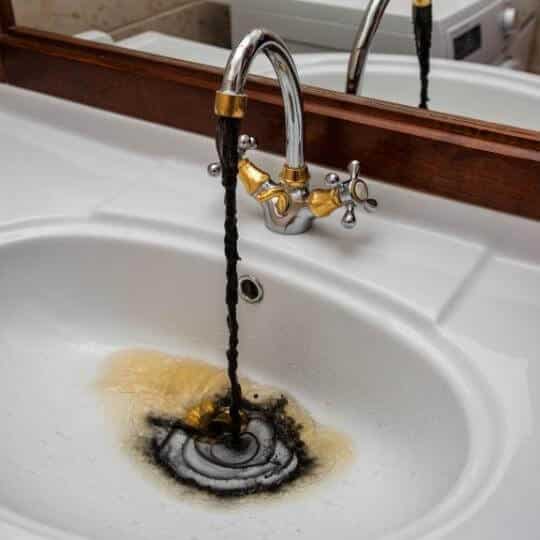
- Plastic pipes don’t rust. Have you gone to open your sink, and brown water came rushing out? With plastic pipes, you will enjoy rust-free water and fantastic plumbing service.
Final Thought
Do you need rough-in plumbing for your new or old bathroom? Do you need to add a basement bathroom? Don’t worry because with a permit, qualified contractor, and the finances to make it happen, it gets done.
For those contractors looking to satisfy their customers, this article will make you understand all you need to estimate the cost for this plumbing job. Let us know your thoughts in the comment section as you have your next rough-in plumbing project completed successfully.

Michael Davis is a heating & plumbing expert who currently works as independent contractor in SC. He also writes for Plumbertip.
For almost 10 years he worked on various plumbing tasks across South Carolina.