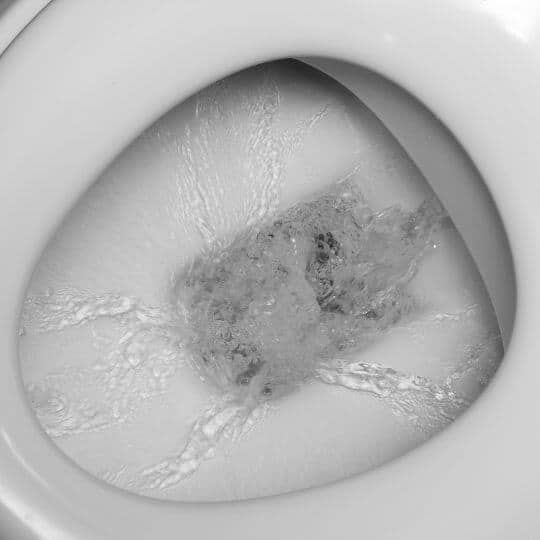
The toilet flushing on its own and it isn’t triggered by anyone in your house. Ghost flushing is the name given to this phenomenon.
Water slowly leaks out of the reservoir and into the bowl, causing ghost flushing. If it continues for long enough, the toilet will flush.
This not only causes some eerie evenings of unexplained noise but also wastes a lot of water. So, what is causing this, and what can you do about it?
Toilet Flushing On Its Own
Ghost flushing, or a toilet flushing on its own, is a typical problem for most houses. According to the EPA, the average American household uses well over 300 gallons of water each day, with the toilet accounting for 24% of total water consumption.
These percentages will rise considerably more with toilet flushing on its own, especially if it occurs regularly. You must figure out why the toilet makes a flushing sound when not flushed to prevent it from happening again.
Even though ghost flushing might be a nuisance, it can also signify something more serious.
It’s usually a symptom of a loosened flapper when the toilet running on its own. It’s sufficient to change the flapper just because it flushes on its own once. You can, however, conduct a definitive test to ensure that the flapper is the source of the problem.
Reasons for Self Flushing
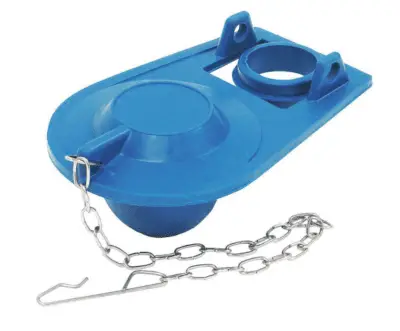
The toilet’s major components are the reservoir and the bowl. When you flush your toilet, the water in the tank is discharged into the bowl, thereby draining its contents. A flapper gasket prevents water from pouring into the bowl when the bathroom is not in use.
The flapper may become loose due to wear and tear or algae buildup around the flapper, hence toilet keeps flushing on its own. When there isn’t enough water in the reservoir, the toilet empties, water fills the tank, and the cycle repeats. Ghost flushing can become a persistent issue depending on the state of the flapper.
You will need to add food color to your tank to inspect the flapper. Ensure that you avoid cleaning the toilet for at least 30 minutes. If the color of the water in the bowl changes, your flapper is leaking. A loosened or damaged flapper, on the other hand, can cause this problem, as can a short chain.
If you just changed or fastened the chain, it could be prompting the flapper to release prematurely or not seal properly [1]. As a result, instead of replacing the flapper, you would only have to loosen the chain.
How to Fix a Toilet That Flushes on Its Own

After you’ve figured out what’s making the toilet ghost flush, you’ll need to figure out how to fix it.
- Repairing the flapper
Repairing the flapper is a simple task that you may complete on your own. Here are some quick and easy steps to get you started.
- First, close the cutoff valve to shut off the water flow.
- To empty the tank, flush the toilet.
- Remove the cover from the toilet.
- Detach the flapper and carry it to your local hardware store to obtain a perfect fit replacement.
- Remove any algae from the area it fills before changing it to ensure complete sealing.
You can repair the current flapper after cleaning it before acquiring a new one because algae can be a problem. Also, make sure the chain in the reservoir isn’t caught under the flapper. If that’s the case, it’s too long and needs to be cut down.
If the leak persists, the complete toilet installation may need to be replaced.
- Replacing the flapper
In the instance of a phantom flusher, the flapper is the most likely culprit. The good thing is that it’s a simple remedy that almost anyone can perform. It’s what I’d do first if it were my toilet.
- Shut off the water supply at the shutoff valve to replace the flapper. This is normally found to the right and below the toilet.
- Detach the toilet lid and place it on the side.
- Next, remove the flapper and take it to the hardware store to select the right match.
- Most flappers are easy to take off and put back on. However, before changing the flapper, ensure the opening it covers is free of any slime or sludge buildup. This will simply improve the seal.
- Checking the flush valve seal’s condition
If changing the flapper did not end the leak, the flush valve seal will most likely need to be replaced. Turning off the water at the shutoff valve is an easier way of determining if the container is still seeping into the bowl. Detach the lid, note the water level, and check again 20 minutes later to see if it has dropped.
The food coloring test is a type of test. Pour a few droplets of liquid food coloring into the container, then wait 20 minutes before returning. Water is still fleeing the tank if there are residues of food color in the bowl.
Touching the gaskets of the tank is another technique to identify if they are failing. When the flush valve seals are touched, a black cloud emerges, indicating that the material is decaying.
- Changing the Gasket on the Flush Valve
Because the tank and bowl must be separated, changing the flush valve seal is more difficult than replacing a flapper. Even so, the average Joe can complete the work. Patience and caution are required. Being careless or frustrated is a surefire way to break the tank, which may transform a $20 repair into a $200 replacement.
For this job, there are a variety of kits available. When the state of your tank may influence your decision, it’s normally better to replace the nuts, bolt gaskets, and reservoir to bowl seal while the top is off.
The most crucial thing is to purchase tank equipment that fits properly. Examine the inside of your tank, as well as the cover.
The tank’s brand, model number, and year of manufacture are usually found here. This information can be used to locate the appropriate parts, whether they are available online, at a local hardware store, or through the manufacturer. If you’re buying the items locally, you might as well bring them with you.
To begin, consider the following:
- First, shut off the water at the shutoff valve.
- Press down on the flesh to drain the tank of the majority of the water. Then, to stop the water from splashing on the floor, soak the remaining with a huge sponge.
- Disconnect the water pipe from the toilet by unscrewing the water supply nut.
- Take off the wing nuts that keep the screws in place in the bowl. Penetrating oil may be required if the screws are severely rusted.
- Detach the reservoir from the bowl and the bolts with care.
- Finally, unscrew the flush valve nut. These may normally be removed manually, though lubricant may be required in some cases.
- Before installing new hardware or gaskets, the toilet may need to be cleaned.
- Change the flushing valve or the gasket on the flush valve. Secure the flush valve nut manually after placing the washer over the valve. To make it simpler to acquire a tight fit, rub the valve with a little dish soap.
- Cover the flushing valve underneath the tank with the tank to bowl the gasket. The sealant is placed over the valve on Kohler units with the triangular gasket just before applying the nut and washer.
- Use a rubber washer on both the interior and exterior of the toilet while installing the screws. In most cases, a metallic washer and nut are also installed on the surface of the toilet.
- Carefully replace the tank on the bowl, ensuring that the screws are aligned with the bowl. Then, underneath the bowl, tighten the wing nuts.
- Tighten the nut and change the water in the supply line.
- Restart the water supply. After that, look for leaks all around bolts to ensure the toilet is properly installed and sealed.
- Make sure there is no leaking by flushing the toilet.
- Allow the tank to refill, note the water level, turn off the water at the shutoff valve, and check the water level after half an hour. Use the food coloring test as an alternative.
- When you’re certain there are no leaks, and the toilet is running properly, turn the water back on.
Toilet flushing on its own? Call in a plumber to fix the problem
While you may replace a flapper with parts from a hardware shop, you may want to hire a qualified plumber in case you wish to get this problem fixed fast and properly. If your toilet is ghost flushing or there are other plumbing issues, call a plumber and have them examine your toilet to see if there is anything they can do to help.

Michael Davis is a heating & plumbing expert who currently works as independent contractor in SC. He also writes for Plumbertip.
For almost 10 years he worked on various plumbing tasks across South Carolina.