Do you want to learn how to install a toilet without professional help?
Over time some parts of the toilet may be broken and finding replacing parts can be almost impossible. Furthermore, outdated toilets with stubborn brown stains can be a reason for replacement too. After some time, everyone should replace them with a new one.
Sometimes learning how to install a toilet yourself is cheaper than constantly paying your local plumber for visits.
Many homeowners choose to install them by themselves rather than calling a professional. Despite it sounding like hard and dirty work, the process itself isn’t too complicated if you own some basic tools. Here’s what you need to know on how to install a toilet.
How to Install a Toilet
Prepare Tools First
To replace a toilet bowl, you will need the following tools:
- Adjustable wrench – for loosening and tightening nuts and bolts
- Screwdriver – for removing screws and disconnecting the water supply line
- Putty knife – for scraping off old wax and caulk
- Hacksaw – for cutting bolts or pipes if necessary
- Closet bolts and wax ring – for securing the new toilet bowl to the floor and creating a seal
- Level – for ensuring the toilet bowl is installed evenly
- Plunger – for clearing the drain if needed
- Gloves and safety goggles – for personal protection during the process
Measure Toilet Rough In
Before installing a new toilet, you should find a new one. Before you decide to remove the old one and go shopping, measure everything for the toilet rough in. The toilet rough-in refers to the distance between the wall behind the toilet and the center of the drainpipe or the bolts that secure the toilet to the floor.
It is a crucial measurement to consider when installing or replacing a toilet, as it determines the compatibility of the toilet with the existing plumbing. The standard toilet rough-in is 12 inches, but it can also be 10 or 14 inches in some cases.
Read More: Toilet Rough-In Explained
Find a New Toilet Bowl
Usually, we recommend one-piece toilets that look modern in any bathroom. They can be bought for less than $300. Just make sure that you take measures before buying it.
Turn off the Water Supply
- Locate the shut-off valve: It is typically located on the wall or floor behind the toilet.
- Turn the valve clockwise: Rotate the valve clockwise until it stops to shut off the water supply to the toilet bowl.
Then, you’d want to flush the toilet so that the water tank is empty.
Remove the Old Toilet
If you are removing the old toilet alone, the first thing you should do is disconnect the tank from the bowl. It’ll be a lot easier to remove the tank separately from the bowl.
Disconnect the water supply line from the bottom of the tank. Sometimes this can be done only with hands.
Cover it up with some old rags to prevent fumes from going back into your home. This will also secure your tools from falling down.
After that, unscrew the nuts connecting the tank to the bowl and carefully lift off the tank. If nuts are rusted, use spray before.
Related: How To Remove Rusted Bolts From Old Toilet Bowl
Install a Wax Seal
With a putty knife, remove the old wax seal. Be sure that the flange below isn’t cracked, and then remove the rag from the hole.
Keep in mind that if the flange is damaged, you have no choice but to call a professional for help. Now, place a new wax seal and hook the closet bolts on their place on the flange.
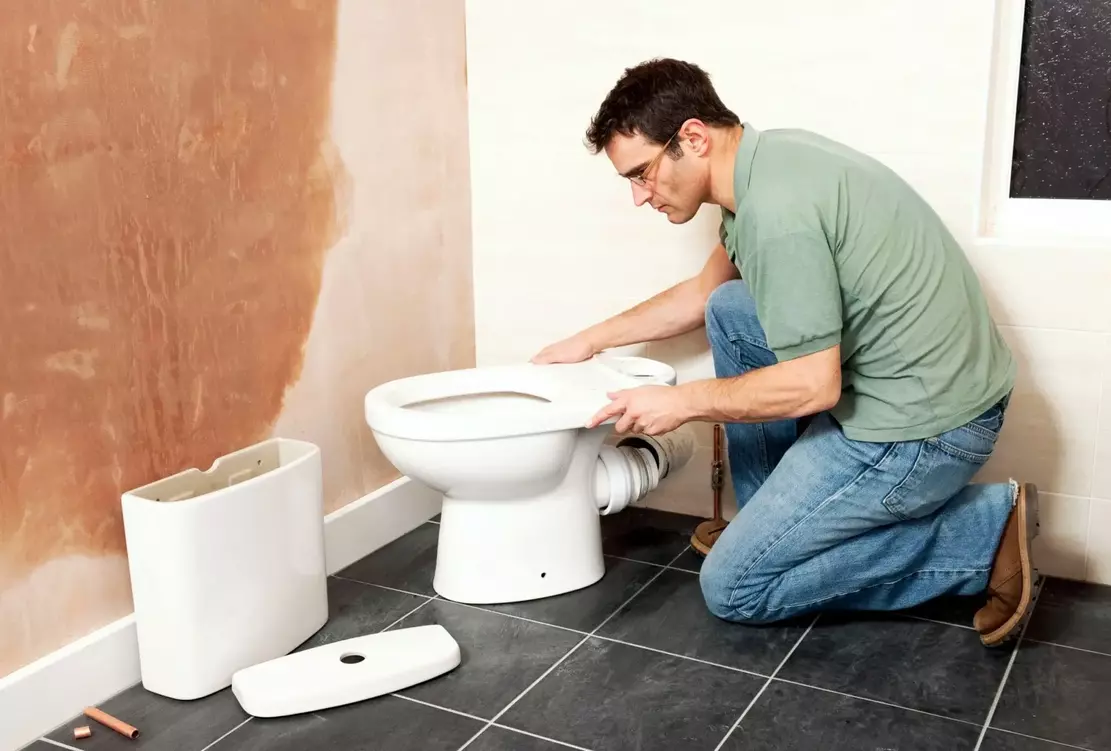
Attach the Tank and the Bowl
Now that the bolts and seal are in place, attach the bowl and the tank. You can do this by sliding the tank bolts through the opening which can be found at the tank’s bottom.
The shanks of the bolts should be lined up with the holes on the bowl. This will make the toilet be put in its place.
Tighten a nut onto every tank bolt to further secure everything. Make sure everything is evenly tightened so that everything can rest firmly.
After that put silicone around the base of the toilet bowl.
Related: Toilet Leaking From Base
Conclusion
Installing a toilet is a manageable task that can be accomplished with the right tools, careful preparation, and attention to detail. By following the proper steps, including turning off the water supply, removing the old toilet, and securing the new one in place, you can successfully complete this essential home improvement project.
Read Next: Toilet Leaking Between Tank And Bowl

Michael Davis is a heating & plumbing expert who currently works as independent contractor in SC. He also writes for Plumbertip.
For almost 10 years he worked on various plumbing tasks across South Carolina.