Is there that one sink in your house that just can’t seem to drain as fast as the other ones? Or maybe your favorite ring went down the drain? Both of these issues require knowledge on how to clean a sink trap.
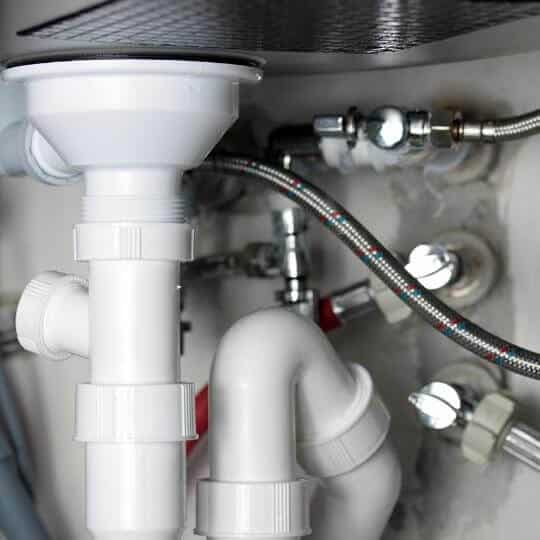
The sink trap is also known as a ‘P-trap’. This is a curved pipe located right below the drain. It connects the sink to the wall, and the bend should always be somewhere in the middle, under the sink.
There is a good reason why this bend exists. It serves to retain just enough water to keep all those nasty sewer odors from rising and contaminating your home. Also, it can catch any small objects that might have slipped down the drain.
However, as time goes by, dirt, debris, and hair can build up in that bend. This can cause the sink to drain much slower than regularly, sometimes clogging it entirely. Fortunately, it doesn’t take long to learn how to clean a sink trap on your own.
Here’s what you need to do:
How To Clean a Sink Trap – Step-by-Step Process
Before you learn how to clean a sink trap for the first time, there are some tools you’ll need. This includes:
- Gloves
- A bucket
- Wrench or channel locks
- An old toothbrush or a bottle brush
- A coat hanger or a wire
- Plunger
- Old towels
- Dish soap
This process will involve some dirty water dripping, unscrewing the slip joint nuts, gunk cleaning, and just making an overall mess, so be prepared.
Luckily, you don’t have to turn off the main water valve to complete this step. [1]
The water won’t go through the sink trap unless you willingly turn the faucet on, so there is no need to worry about a huge leak that would require you to shut off the water source.
Still, if this is the only sink in the house, you might want to warn your other household members that they won’t be able to use it for around an hour.
Without further ado, here is the step-by-step process on how to clean bathroom sink drain trap:
Step 1
Before you do anything else, you should place an empty bucket underneath the sink drain and the sink trap. While the water won’t start pouring down, unlike when you’re doing some other bathroom work, such as fixing a water heater leaking at a relief valve, you should expect some water dripping.
By placing a bucket underneath it, you will prevent yourself from making a mess during the next steps. It can also help you catch any tiny parts you might drop during the process.
Step 2
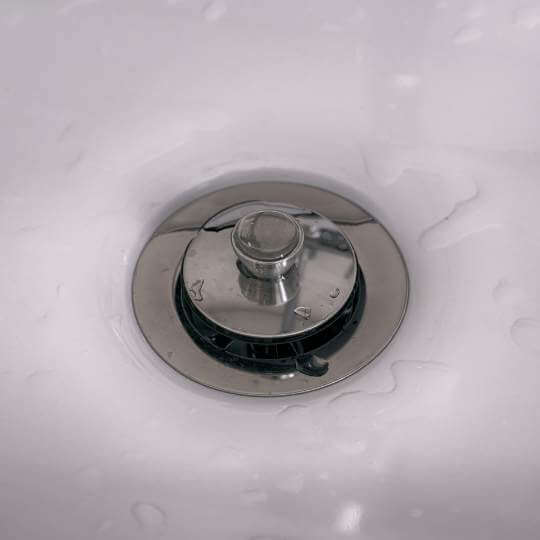
Don’t forget to clean the sink stopper, if you have one. This might include you having to remove a pivot rod to remove the stopper properly. To do this, you should look under the sink and find a locking nut. This is where the pivot rod links to the drain pipe.
Unscrew the nut, then pull out the rod. This should be enough to remove the stopper. Then, you should screw the rod and the nut back into place, but without the stopper. This can also help you with cleaning a sink trap.
If there are any hairs on the stopper, remove them. You can use your hands for that. If this is too nasty for you, put some gloves on or use a wire. Don’t return the stopper until you’ve cleaned the rest of the sink trap.
Step 3
Now it’s time to clean out the sink trap! There are several ways you can do this. Here are a few of them:
- Use a wire or a coat hanger to clear any obstructions. Bend one end of either of the two so it’s shaped like a hook. Stick this end into the sink trap then pull. This will help you get out any hair clumps, paper, or some other harsh obstruction.
- If this isn’t enough, try pouring boiling water down the drain. About 1.5 liters of water should be enough. Don’t pour everything at once. Instead, use only about a half. You’ll need the second half later.
- Next, fill your sink with water. This is necessary for the plunger to become suctioned to the sink. Once you’ve done that, place it on top of the drain entrance. Make sure there is enough water to submerge the entire plunger.
- In case you have a double sink, cover the other drain with something like a wet rag. This is so the water won’t spew out of the drain while you’re trying to unclog the first one.
- Consider the size of your sink when choosing the plunger. [2] Some vanity sinks are too small for regular plungers, so you might need to get a small one. Your local hardware store might have what you need.
- Move the plunger up and down vigorously for approximately 20 seconds. Make sure to pop the plunger off during the final upstroke. This will create additional pressure that might help to unclog the sink trap.
- If the drain is still clogged, keep on plunging. The best way you’ll know if everything is working properly is if the water whirls down the drain quickly. Don’t be afraid to repeat the plunging process up to five times, if necessary.
- Once the water is being drained out properly, mix the remaining boiling water with a few drops of dish soap. Reheat the water, if needed. Then, pour it down the drain. This should help clean down any residue from the sink trap. The dish soap helps remove any grease, so it can be very helpful.
Another good option is to pour baking soda after you’ve poured boiling water for the first time. You should let it sit for up to ten minutes. If your sink is entirely clogged, consider leaving it longer. Then, mix a cup of vinegar with a cup of boiling water and pour this down the drain, as well. Let this sit for around half an hour, then rinse it with boiling water again.
Overall, there are plenty of home remedies for clogged drains. If you don’t know how to clean a sink tap, it might be worth checking them out.
Step 4
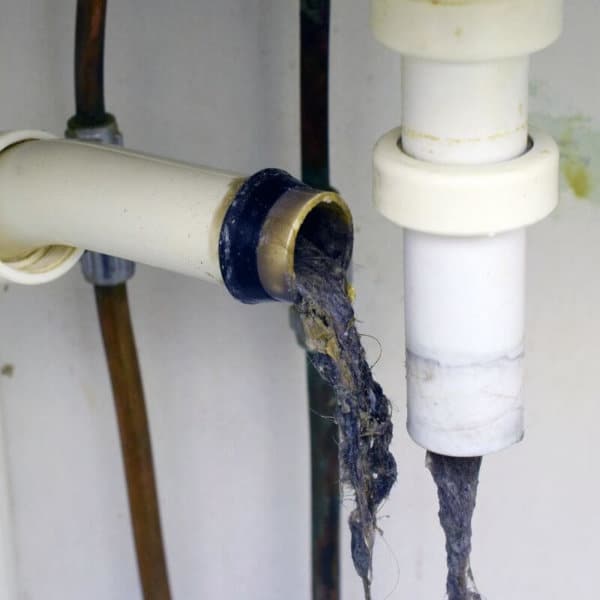
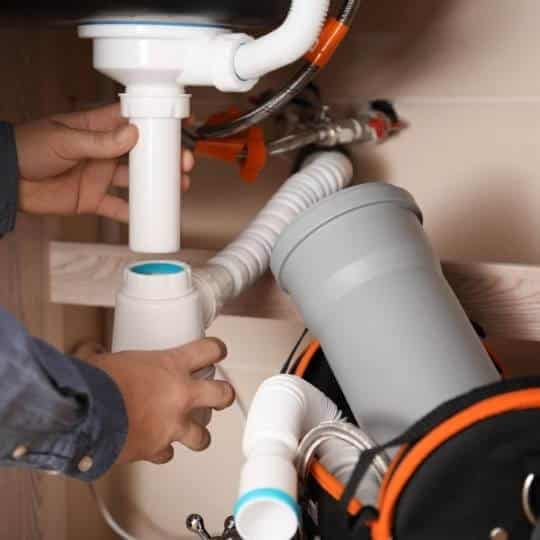
If previous steps didn’t work and the water still won’t drain properly, you should remove a sink trap and clean it this way.
Take the wrench or channel locks, whichever you prefer and whichever works best for your sink type. Then, start unscrewing the slip joint nuts on all sides of your sink trap.
In most cases, it would be enough to just give them a few turns. After that, you should be able to finish removing them just by using your hands.
Using hands is preferred over using tools, as this gives you more control over the process. Also, this allows for a better grip. This might make the process easier for someone inexperienced in plumbing work.
Step 5
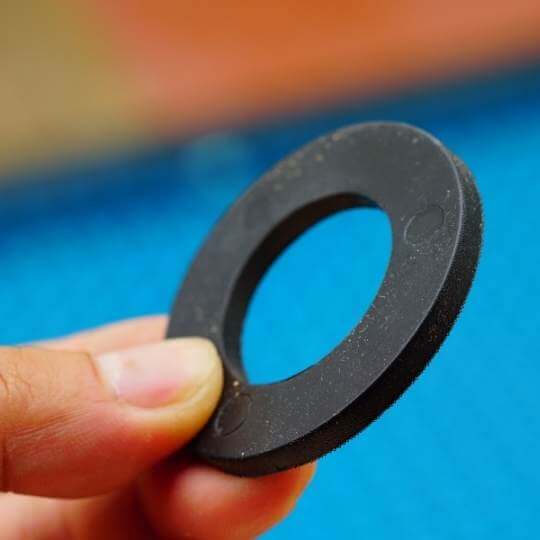
Once you’ve removed the trap, you might notice that between the trap and the slip joint there is an O-ring. Remove it, and put it in some safe place, as you’ll need to return it later.
It’s important to have in mind the correct order that these parts go in. First, you have the slip joint nut that goes onto the tailpiece. Next goes the O-ring. Finally, you have the threaded tap end. The same goes for both the side that goes to the drain and the other side that connects to the wall.
While not necessary, you might want to put an old towel inside the pipe to prevent sewer gasses from reaching your home.
Step 6
Use a bottle brush or an old toothbrush to clean any gutter located in the trap. You might also want to rinse it using another sink. This can further help remove any residue that might be clogging the trap. Just be prepared to wash the sink later on, as this can be a dirty job.
Step 7
Once you’re done cleaning a sink trap, it’s time to reassemble it. Make sure to follow the order of the parts that we’ve listed before.
Tighten the slip joint nuts with your hands until they are fairly tight. Then, tighten them up a bit more using the wrench. Don’t overtighten, as plastic traps can crack if you go overboard.
Turn the faucet on to ensure there are no leaks. If the water is draining normally, congratulations! You’re done cleaning up your sink trap.
Knowing how to clean a sink trap is an easy but very useful task.
A clogged sink trap can lead to bad odors coming from your sink. Not to mention that, if it clogs completely, you might not be able to use the sink altogether! This is why it’s important to have everything working properly.
While some people prefer calling a plumber, there is usually no need to pay up to several hundreds of bucks to a professional for such a simple task.
Trust us – you can likely do this by yourself. Still, if the clog is persistent, don’t hesitate to ask for help. Anything is better than leaving the sink trap clogged for too long.
Read Also: House Smells Like Gas But Have Electric

Michael Davis is a heating & plumbing expert who currently works as independent contractor in SC. He also writes for Plumbertip.
For almost 10 years he worked on various plumbing tasks across South Carolina.