If you’re wondering how to fix a leaking wall from rain water, chances are you’re already facing visible problems.
Water leakage inside walls, whether interior or exterior, is a problem that presents itself really slowly.
The early signs are easily overlooked, and before you know it, your whole house foundation is in danger.
No need to panic, as that certainly won’t fix anything. The smartest thing to do next is to fix this problem as sooner as possible.
To help you identify the leak, fix it, and prevent it in the future, we’ve gathered all the useful information here.
How to Find Water Leak Inside Wall
![]()
The first point of fixing the leak inside a wall is finding the source of the leak. It’s when you pinpoint a source that you can work on solving the whole problem.
To find the source of the leak, all you need to do is trace the signs. These signs are the symptoms pointing to the source of the leak itself.
The signs of rain leaking inside the walls may include:
- Damp masonry
- Sagging, damp or discolored drywall
- Warped paneling
- Bubbling wall paint
- Peeling wallpaper
- Standing Puddles of water
- Dripping noise from the walls
- Musty smell
- Mold growth
Damp masonry and sagging, wet, damp, or discolored drywall is a telltale sign of water inside walls. Just noticing these two signs is not enough to identify the leak, so you need to search for other signs too.
Something that almost always presents itself on a leaking wall is the brown or yellow patches or stains. In some cases, you may even notice a yellow stain on the ceiling that is connected to a damaged wall.
In more extreme cases, you may even notice puddles of water at the bottom of the damaged wall.
Other signs of rainwater destroying the walls are warped or peeling wallpapers and/or bubbling paint on the walls.
Finally, what’s also easily visible is the mold growth on the walls. A typical musty smell is what usually accompanies mold growth on the walls.
Identifying the Leak
There is a difference between an inside and an outside leak. If the leak seems to be constant, it might be hard to pinpoint where it’s coming from.
However, if the leak is more constant during rainfall, your list of possible causes shortens drastically. In other words, at least you know that the faulty interior plumbing is not what you’re facing.
Let’s now look at the possible things that allow the rainfall to enter your interior house walls.
- Damaged shingles
- Blocked window weep holes
- Blocked drain spouts
- Hydrostatic pressure (due to water seepage in the basement or just moisture in the basement)
Water Leaking Under Exterior Wall
Although similar, the effects of exterior wall water damage may or may not be caused by the same things. That is to say, the damaged shingles or blocked drain spouts may cause both interior and exterior wall damage.
What allows the leaks in exterior walls are:
- Poor construction material quality
- Not using the right wall waterproofing primer
- Not using the right exterior paint
- Exterior wall cracks
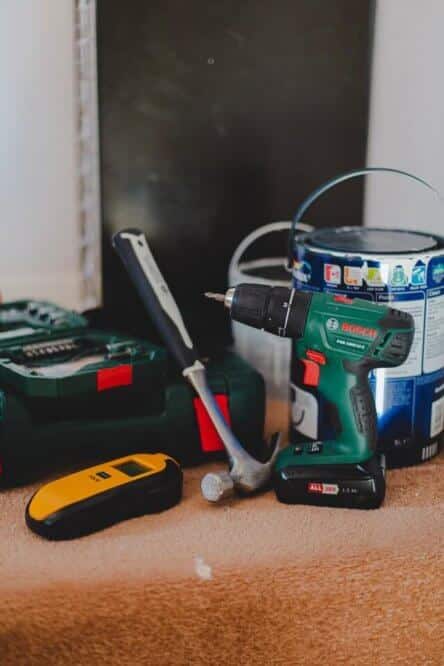
Before you start repairing the walls from rainwater damage, you need to be aware of the size and depth of the damage. Luckily, there is a tool to help you with that.
Wall Water Leakage Detector
Tracing the wall leak is not that easy. Even all of the above-mentioned signs might not be enough to locate the leak.
This is why the moisture meter tool exists. The most popular are the two types of this meter: pinless and pin-type moisture meters. [1]
The pinless moisture meter detects moisture of the surface by scanning for electromagnetic frequencies with a sensor pad.
Pinless moisture meters can scan a relatively large area and don’t need to break or damage the surface in order to scan it.
On the other hand, pin-type moisture meters have two pins, and they scan the moisture between those pins. In fact, a pin-type moisture meter measures the electrical resistance between these two pins.
To use a pinless moisture meter, follow these steps:
- First, set a moisture meter reference scale. Setting a reference scale means setting a numerical value to get accurate qualitative moisture readings. [2]
- Take a dry sample of each surface you will be testing.
- Then, push the meter against the damp surfaces in the wall.
Scanning with a pin-type moisture meter is a bit different. The two electrodes on this moisture meter can be used in two different ways:
- You can penetrate two electrodes into the surface to get a reading of the moisture levels. This is considered a more invasive method, as the pins have to break the scanned material.
- You can also get a scan by just touching the surface with pins.
Moisture meters have a digital indicator scale that shows you the moisture level from 0 to 100. This scale range is shown in percentages and can vary depending on the type of material that is being scanned.
For example, the pin-type meter scanning wood will show moisture levels from 5-40%. On the other hand, scanning a wall can show anywhere between 5-17% moisture.
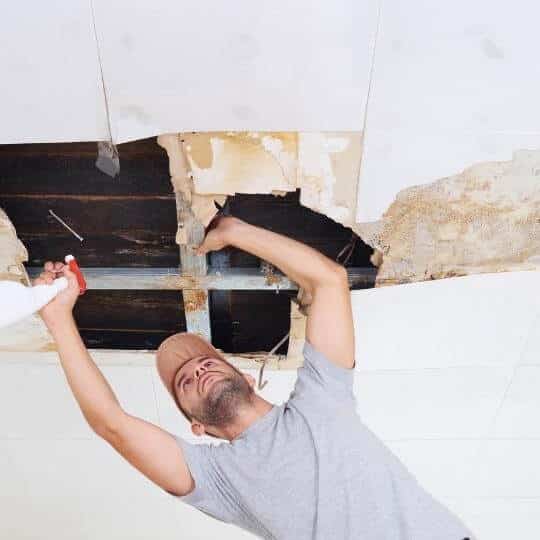
How to Stop Leakage From Wall
![]()
Evidently, the best way to treat a wall leak is to act on the root cause of the leak. Most water damage situations are not simply fixed by repainting the surfaces.
The number of steps fixing the leakage takes will also depend on the amount of damage that the rainfall caused.
That being said, be prepared not only to replace the roof tiles but also to replace certain construction materials.
This process usually takes time and also skills. You don’t want to compromise your living situation, so know that major rebuilding is best done by professionals.
Water Leakage in Wall Solution
As mentioned previously, your fixing steps will depend on the root cause and how serious the damage is.
Note that fixing both interior and exterior walls mostly consists of some general steps, and they do intertwine.
That’s mostly because rainwater damage affects the walls that make the foundation of your house. When exterior walls are affected and left untreated, they lead to interior water damage.
Fixing Interior Wall Leaks
- Repair the root cause
That is – replace the damaged roof shingles. If the gutter/downpipe is blocked, you need to unblock it. [3]
Seal any gaps between the window and wall and also between the door and wall.
Possibly, you’ll need to unblock the window weep holes. When blocked, these can’t drain water properly, so they can create water damage after rainfalls.
- Clean the area
To repair the wall, you’ll need to do scrape off any dirt, debris, or mold from the wall. Hopefully, these don’t go too deep into the walls and can be removed with a surface layer of the wall.
Sometimes, the damage runs deeper, so you need to remove more layers of the walls if they’re damp.
1.Apply cement or mortar
To fill in the cracks in the wall, apply white cement or mortar. You could also use some other types of waterproofing material, such as the Clear Binding Primer.
2.Repaint the surface
After allowing the area to dry out, you can repaint it again. It’s recommended to use a waterproof type of paint. [4]
Fixing Exterior Wall Leaks
Cracks forming on exterior house walls because of extreme weather conditions are possible and even common in some areas.
The exterior walls can become easily damaged if the house is old. This can also happen if the construction materials used to build a house are not of good quality.
The exterior house walls make up a vital part of any house structure and need to be waterproofed. Follow these steps in order to repair the damaged exterior house walls:
- Repair the root cause
As the case with interior wall damage, you want to first repair the root cause. Sometimes, this means repairing the leak in the ceiling or unblocking the outer plumbing units.
Other times, the exterior walls get damaged simply because of poor construction material or damage over time. That’s when you move on to the next step.
- Remove the plaster off the outer walls.
The plaster should be removed from the outer walls of the house – especially the ones surrounding the cracks.
- Refill the cracks with cement
The next step will be refilling the holes with cement.
There are different ways and methods of doing so to achieve a waterproof surface. One of them is shot concrete (or shotcrete), which is better quality than traditional concrete.
- Repaint with waterproof paint
It goes without saying, but you should choose a more sturdy waterproofing material for the exterior of your home. There are plenty of waterproof paints available on the market.
- Seal the doors and windows
No matter how good of a job you did to protect the exterior walls, the rainfall may find its way through window cracks.
Choose the waterproofing material based on the material of your doors and walls. You can choose between silicone and rubber caulking for this purpose.
Water Leak in Wall Repair Cost
The cost of the water damage repair will greatly depend on the size of the affected area and any additional restoration work that needs to take place.
The average cost of wall damage repair will be anywhere from $1,000 to $4,000.
As mentioned, this will depend on the size of the area and also on the number of areas affected. Repairing one wall won’t cost you nearly as much as repairing two walls on both interior and exterior of the house.
If the repair requires some serious demolition, it can cost you up to $8,000.
Plumbing can be expensive, so it’s important to find and block the source of the water immediately.
How to Fix a Leaking Wall From Rain Water By Yourself
Fixing a leaking wall DIY is possible only to a certain extent.
The best thing to do is learn how to prevent rainwater damage in the future. Other than that, you can cover up the damage while waiting for the professionals to come.
Simply clean the damaged area first with a mixture of water and dishwashing liquid. This will remove any mold or other dirt that sits on the surface.
The appalling look of the damaged wall won’t disappear completely. What you can do to cover this is place a painting, a sculpture, or a piece of furniture in front of the dampened wall.
However, be careful not to place anything wooden or iron in front of the damaged wall.
Of course, this won’t fix the problem altogether, but it will cover it temporarily if you need to do so.
Who to Call for Water Leak in Wall
To fix a water leak inside the walls of your home, you need to call a professional emergency plumber.
However, do keep in mind that emergency repairs usually cost more.
If the repair is needed but not that urgent, make sure to consult a reputable professional plumber beforehand. This way, you also ensure a plumber doesn’t rip you off.
The plumber will come to inspect the problem and tell you the estimated time and cost. Smaller repairs (of one or two walls) take about 24 hours to fix, while larger ones need more time.
Now you learned how to fix a leaking wall from rain water and are aware of all the necessary steps.
Be aware that the rainfall seeping into your house walls is not a minor problem, although it may start as one. If you just noticed some cracks here and there, you might still have time to fix them with some DIY tips.
However, even the smaller cracks in the wall sometimes reveal deeper water damage. Walls are an important part of the house foundation, and you don’t want them to shift, leak, or be unstable.
The best advice we could give you is to block the source of the leak and contact a professional as soon as possible.

Michael Davis is a heating & plumbing expert who currently works as independent contractor in SC. He also writes for Plumbertip.
For almost 10 years he worked on various plumbing tasks across South Carolina.