The sewer lines are one of the universally present parts of our homes. While we rarely spend much time thinking about them, outside of occasional issues cropping up, they do quite a lot of heavy lifting which allows our homes to be conveniently rid of harmful materials. Rarely do we consider that we know very little about this important part of our homes. Today, we will help you get a better grasp on them by covering how deep are sewer lines buried as well as some other important factors when working around your home.
How Deep Are Sewer Lines Buried and Why Dept is Important
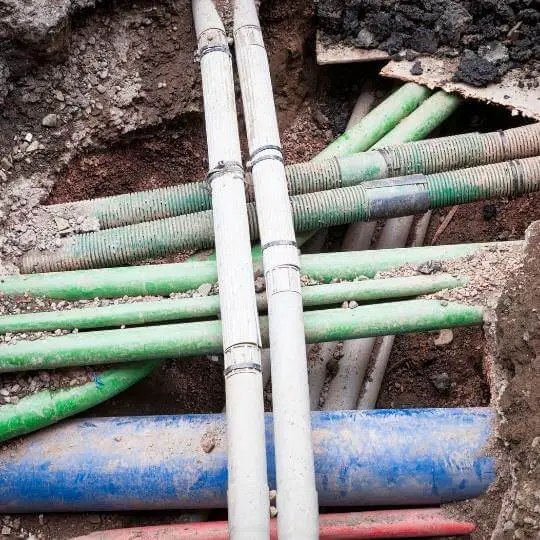
![]()
It’s safe to assume that every measurement in our daily lives is done for a certain reason. The depth of sewer lines is no different. The importance of proper depth is a multi-point one. After all, plumbers wouldn’t go through so much labor for nothing when installing your new pipes.
1)Physical damage protection
By burying pipes at a proper depth, we make certain that they won’t be damaged from above. Various activities performed above the earth could cause damage to a shallow pipe. Even something as mundane as digging out a small bit of earth, potentially for gardening reasons, could reach the pipes if they are shallow. Physical damage from this contact could cause cracks and leaks, leading to a lot of headaches with the repairs. [1]
2)Protects from weather
Cold weather and harsh climates are exceptionally dangerous for sewer pipes. That’s why we bury pipes below the frost line. Frost line, or frost depth, is the depth to which the groundwater in soil is expected to freeze. It varies depending on the climate and conditions of the area but the protection they give our pipes is nonetheless useful.
3)Protects from natural disasters
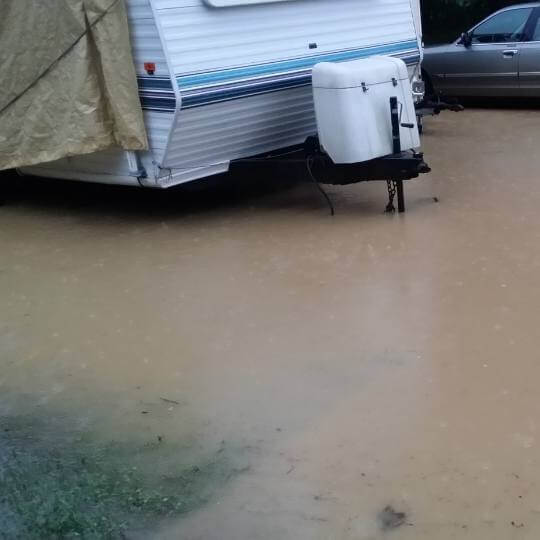
Places that have frequent natural disasters get extra protection from adhering to the proper depth of your sewer pipes. This also counts if your area is prone to floods. If a place floods, the excess water and debris brought on by it could speed up the corrosion of a sewer pipe or even seep into it through leaks and cracks, leading to sewage spilling through the yard.
4)Tree root invasion will be less prevalent
A shallow sewer pipe will be more susceptible to tree roots burrowing into it while growing. The tree roots can be an issue for just about any sewer pipe as they detect the change in moisture and direct their growth towards it.
Once the pipe has been reached they come in through the cracks. Tree roots can continue growing inside of the sewer pipe, eventually clogging the system. This requires certain resolutions that can either be simple or require replacing pipes fully.
If you don’t take proper care of regulations for pipe depth, you could be facing legal issues. Check what is the minimum depth of a sewer line in your area as well as any factors that may impact it before engaging with the installation. The variations on minimum depth can be sizeable depending on your state.
For example, if we know how deep are sewer lines buried in California, which is 18 inches for those concerned, it doesn’t mean we’ll know the minimum depth for another place.
What’s the process of installing sewer line yourself?
Sewer pipes make a very important part of our homes any sewage, contaminating substances, or other potentially harmful materials are carried away without us having to even worry about it. However, to achieve this level of convenience the sewer pipes require us to properly install them.
This can be a rather expensive endeavor and can result in a multitude of blockades and troubles. It can also be exceptionally pricey to take it on, which is why some of us may opt to install sewer lines themselves to cut down on costs. Below, we’ll cover how you can achieve this while avoiding the potential pitfalls of DIY sewer installation.
- Locate present pipes
In case your home already has sewer pipes installed but recent events have rendered them useless, you could use the previous positioning of those pipes as a starting point.
This doesn’t mean you should neglect the below steps though, it’s better to make sure the position that was used is optimal before proceeding. Events such as erosion, earthquakes, and other natural events could skew the location to the point where it could be the source of issues you’ve experienced.
Regardless, you’ll need to know the location of previous sewer pipes, as well as other installations running below your home, in order to avoid potentially damaging them during the sewer installation.
- Determine the elevation
Once you’ve charted out the location of underground installations, it’s time to check the elevation pipes will have once installed. More specifically, we refer to the elevation of each end of the pipe. The main drain of your home should be on a higher elevation than the rest of the pipe. That way, the downhill slope will enhance the outflow of water. The other end is the location where your home’s sewer pipes connect to the city’s sewer system.
To measure the elevation, you have a few options available. Some may go about elevation measurements by using standard surveying equipment. [2]
Search for these in your local hardware stores as well as similar places that could provide you with appropriate gear.
For those more tech-savvy, there are laser and GPS-based surveying equipment that can streamline the process further. There are plentiful configurations to dig into and figure out when getting these, so those who prefer versatile and customizable equipment should definitely look into them.
No matter how you end up measuring it, measuring elevation will prevent your home from having outflow issues. These can escalate to the point where the sewage stews close to our home, releasing an awful stench throughout our household. Once elevation has been set, it’s time to proceed further.
- Calculate the slope
Similar to the elevation, the slope makes sure our pipe will have a good drop when disposing of sewage. The way we calculate the slope itself takes a bit of math.
First, you’ll need elevations and the length of the pipe, you should probably have these ready already with the previous steps done.
Next, subtract the ending elevation from the starting one to get a total drop in elevation. Now all you have to do is divide the drop by the length of the pipe and multiply the result by 100 to get the percentage of your slope’s slant.
The minimum slope that you’ll usually see is about 2 percent but it can vary. That’s why you should check the requirements of your local area’s code to accurately discern the minimum slope required. The slope can be somewhat steeper but you shouldn’t allow them to get out of hand. Otherwise, you could end up with clogs in sewer pipes.
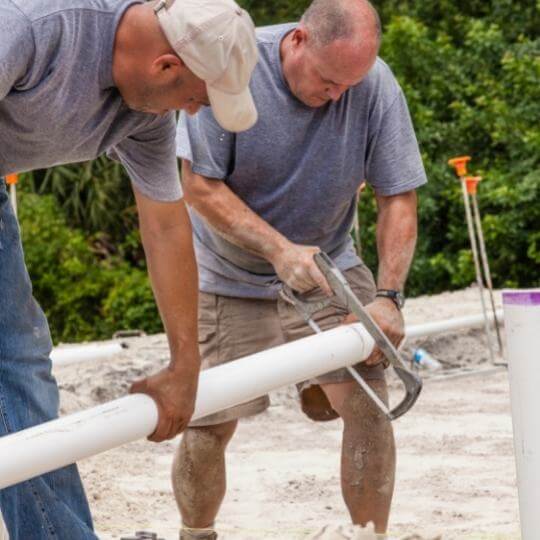
- Dig the trench
After those calculations have been finished, it’s time to get to digging a trench. [2]You should be careful when digging into the earth because it could disturb the soil. This can lead to erosion and other issues so it’s good to keep the trench as narrow as possible. Of course, if you want some leeway with the installation, you should leave some extra space to cover for any uncertainties during placement but do make sure the trench isn’t too wide.
Once the trench has been dug up, you should make sure the bottom of the trench is properly compacted. Compacting soil will reduce any side effects caused by disturbing the soil while digging the trench. After that, bedding material should be laid down. This bedding material will provide additional support to the pipe once it has been installed.
- Install the pipe
What you should know about actually installing the pipe is that pipes are installed one section at a time. That way, they can be better connected and reinforced before the other set is installed.
Make sure to start from the lower elevation and move towards the higher one when installing pipes, it’s an important part of setting them up that makes the process easier and more reliable. If you were to start from the main drain you could run into issues of the pipe slipping or connections being compromised due to the inherent slope. Moreover, the chances of leaks are minimized through this installation process.
During the installation, pay extra attention to connections between pipe parts. If any of them are left loose you could be facing some serious problems soon after the installation. Once all the pipes have been connected properly, it’s time to fill the trench back up. Adding the backfill in layers is a good way to go. Start with a layer of sand which will further protect the pipe and eliminate potential pockets of empty space around the pipe. Then cover it in soil one step at a time.
The Verdict
![]()
The depth of your pipe should adhere to the standard measurements of the area you are living in. Lacking proper depth, the pipe can easily face highly detrimental effects from its environment. Not only will this cause plumbing issues in your home, it could get you into legal trouble as well.
When it comes to installing the pipes yourself, this factor is only one of many to keep in mind as plentiful calculations are required for a quality plumbing installation. Make sure not to slack off on any of these or the money you saved could be spent on rectifying the mistakes done during the process.

Michael Davis is a heating & plumbing expert who currently works as independent contractor in SC. He also writes for Plumbertip.
For almost 10 years he worked on various plumbing tasks across South Carolina.