If you are a homeowner, you must maintain your house. Sometimes, you will buy a house that had hidden damages. Other times, something will simply break from old age. Shower leaking behind wall is a common issue that requires urgent taking care of. Keep in mind that if you can see the leak, the problem is small and easy to deal with. You should be worried about the leaks that you can’t easily see.
Shower leaking behind wall – Urgent Problem
When you have a shower leaking behind wall, you can end with damaged walls and a huge water bill. This is a problem that should be fixed immediately.
They will cause the most damage and can require a professional to fix it.
If you have the experience or feel like it, you can always try to deal with it yourself first. Below are some tips on how to deal with a shower leaking behind wall and what the causes are.
What to Do if the Shower Faucet Is Leaking?
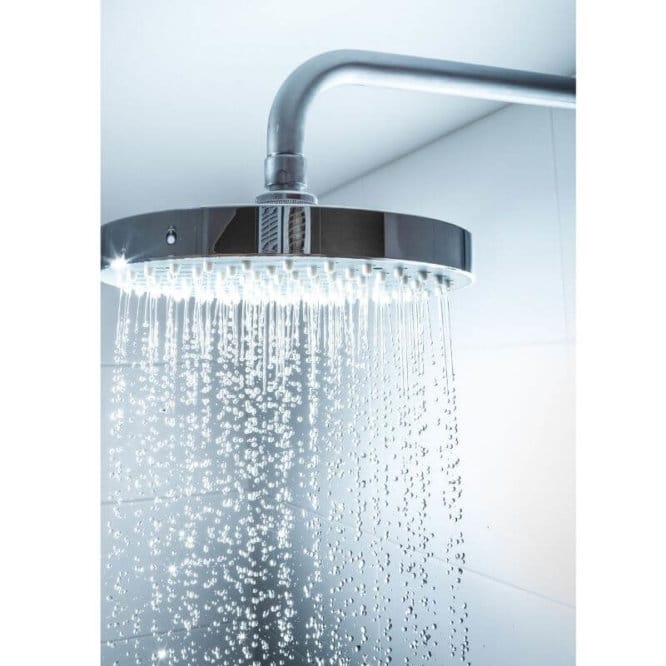
If the shower isn’t leaking behind the wall but you can see the faucet dripping, this is easier to fix.
The malfunction is annoying, and repairing it can be expensive.
However, in most cases you can do this all by yourself. When water drips from a shower head, this means there is a problem with the shower valve.
Here are few steps how to prepare everything for repairing this issue:
- Turn the faucet all the way off, but don’t over-tighten it;
- Place rags in the tub or shower floor to protect the surfaces;
- Turn off the water supply;
- Open a shower valve;
- Drain water from the nearby pipes;
- Take off the shower head;
- See if anything is broken;
- Recognize type of your shower head;
- Replace the broken part or the shower head itself.
If you have a showerhead that keeps on leaking, maybe it’s time to change it with new one. If this problem is persistent, maybe it’s time to find a longer-lasting solution.
You probably don’t want to waste all the money on the plumbers. The good choice is to buy a universal shower valve body that will make everything much easier.
We can suggest the Delta Faucet R10000-UNBX .
It worked great for our faulty faucet. Of course, you can find similar products that will work great for you.
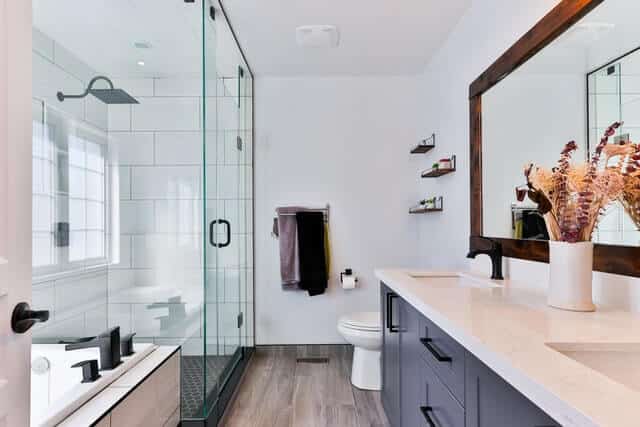
If the leaking is coming from behind the shower, then everything gets trickier.
Signs of Shower Leaking Behind Wall
It’s not always easy to notice a shower leaking behind wall. In some cases you have to be a true detective to find the source of leakage. To do so, you have to look for ‘evidence’.
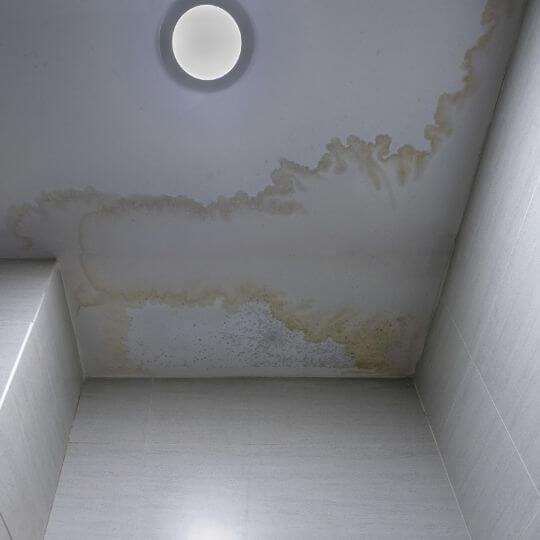
One of the signs of shower leaking behind wall on the first floor is water dripping from the ceiling.
Keep in mind that this doesn’t mean the pipe hole is exactly above the dripping spot. Water can go up a wall or move through the ceiling looking for cracks. Finding the exact spot is difficult.
Another thing you should look for is water stains.
They can show up on the wall or even on your basement ceiling. When someone is showering upstairs, the water might start dripping immediately.
In most cases, though, the water moves slowly through the leak. The faulty valve may have just a pinhole that not a lot of water can go through.
Sometimes it can take years before the water reaches the surface and a stain appears.
The last visible sign is when the tile in front of the wall becomes sponge-like. This happens when it’s been wet for a long while from the inside.
Usually, this means the leak is right there, inside the wall.
Find the Exact Spot of the Leakage
When you have a shower leaking behind the wall, the exact location usually isn’t easy to find.
Most of the time, it even isn’t close to the shower of the faucet. However, the best thing you can do is to completely remove the shower plate.
This will leave you with enough room to inspect most valve connections.
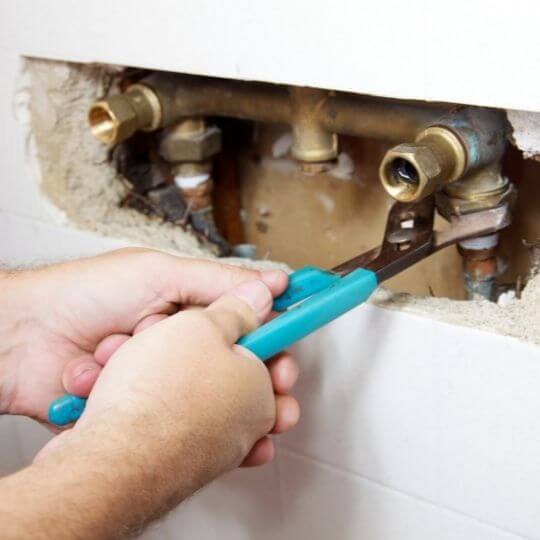
Also, if possible, remove a portion of the wall that is right behind the valve. Inspecting the piping around the valve is just as important.
In some modern houses, you can find a plumbing access panel. [1]
If there is one, it’s usually located inside the wall right behind the shower. With it, you can easily inspect water pipes that lead to the tub or the shower.
This will make everything much easier for you. The only thing you need to do is to take the panel off for inspections.
Some homes require you cut a little window on the drywall so the water pipes are visible. Don’t worry about it.
This is small damage compared to what could happen if you don’t fix a shower leaking behind the wall.
How to Fix the Shower Leaking Behind a Wall?

If the leak is at the shower arm and elbow connection, fixing shouldn’t be too hard.
The first thing you should do is remove the escutcheon and inspect the threading and pipe joint compound.
Sometimes the cause of the leak is the dry and brittle joint compound.
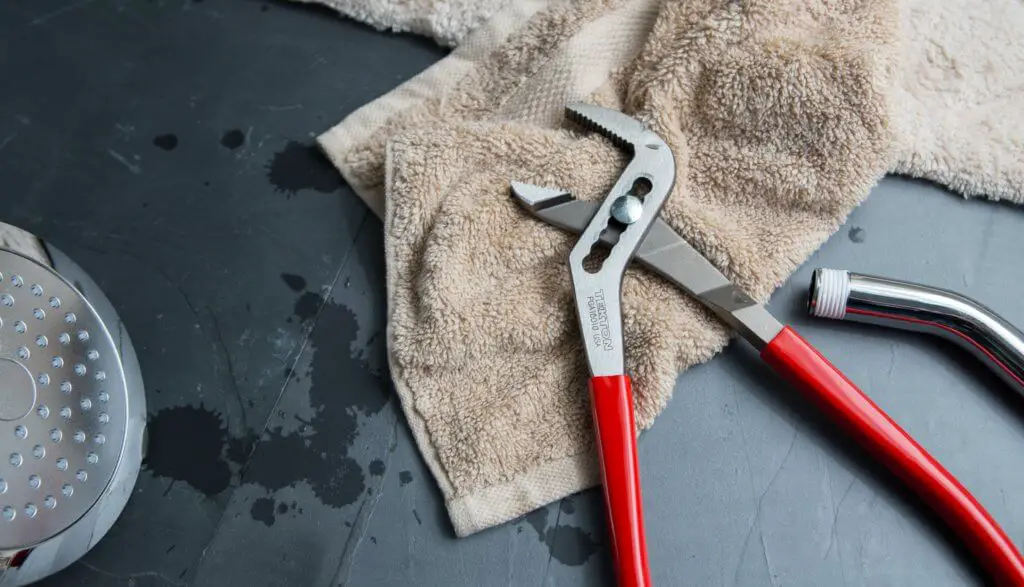
Remove the pipe joint and polish it with a cotton cloth.
Seal the threads of the shower arm with a Teflon tape and wrap it in the anti-clockwise direction.
Tighten the connection with a pipe wrench. This will prevent the tape from unraveling.
Once you’ve cleaned the dry pipe joint compound reattach the shower arm.
When you finish replacing the escutcheon, turn the water on. If there are no leaks, cover the panel cutaway with a grill.
Sometimes the only thing that should be done is to tighten the shower arm.
Keep in mind that if you tighten the shower arm too much, the elbow of the pipe can get damaged. If this doesn’t stop the leak, then the fault may be at the elbow.
If the leak is in the elbow, the fix is similar. Remove the shower arm, clean the threads and reinstall or replace the arm. Once again, this can be done with a Teflon tape.
The arm should simply twist into the elbow. Be careful not to cross-thread the connection.
If even this isn’t helpful, then the problem may be with the vertical shower pipe. You may be able to fix this by yourself, but you will have to gain access to the shower plumbing.
Again, this is way easier if you have an access panel. If not, you’ll have to cut a hole in your wall.
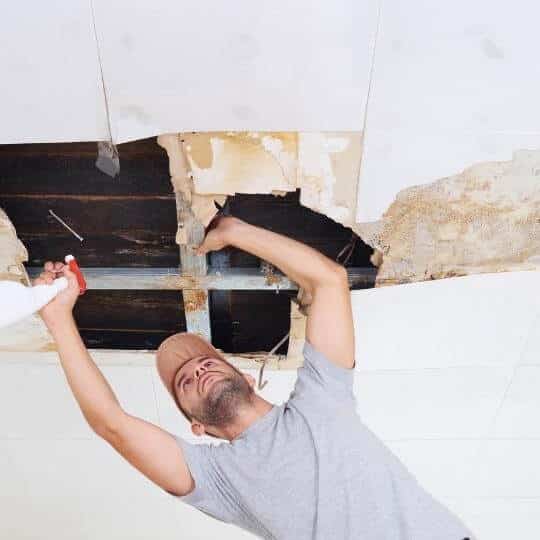
Cut an Inspection Window and Turn on the Shower
Cutting an inspection window is the best thing you can do when you want to detect the leakage.
This is easier if you have a stud finder, but you can get by without it. Knock on the wall to find studs. You’ll know where the studs are by the knocking sound.
If the wall sounds hollow, the stud isn’t there and you should keep on looking. When you’ve found it, cut an inspection window with a reciprocating saw. It’s usually enough to simply cut a 10×8 inch square.
Use a flashlight and a small mirror to get a better look.
Another good tip is to turn your shower on at the same time. When the shower is on, the water will leak more. Sometimes these leaks are no more than just drops on the pipes.
You have to look carefully. Combine this with the above-mentioned tips for finding signs of leaking.
The water is likely to drip from the shower arm or the shower valve. Keep on searching until you’ve found the exact location of the pipe leak.
If the leaking occurs at the galvanized pipe, it’s probably possible to replace the pipe.
This can be done with simple twisting and turning. However, if the piping is made of copper, the joints are probably soldered.
Now, you’re in trouble and you have a tough decision to make.
Soldered copper is the highest quality when it comes to plumbing.
You can’t replace everything and make it as good if you do it by yourself. If you want to have quality, hire a professional plumber.
They might have the knowledge and skill to cut the vertical pipe and add a new section.
With this, they will also replace the drop-ear elbow with a soldered coupling. If you were previously considering replacing the entire shower faucet, this is the right time to do so.
Ask the plumber to help you with this task, as well. This way you will have a brand new, leakage-free shower.
If you are willing to try to fix everything by yourself, you can still do that.
The quality will be lost, but sometimes people just don’t want a plumber’s help. You may be able to splice in a new shower pipe section, together with the ear elbow.
This is done with push-in fittings. Cut the shower pipe above the faucet and, with a push-in coupling, splice in a new length of pipe.
When this is done, install a push-in drop-ear elbow to the pipe’s top. Make sure that the elbow is secured to the wall framing. Also, install a new shower arm. This should make the repairs complete.
How Much Damage Can a Leak Cause?
A shower leak can cause great damage to your home, especially if it went unnoticed for a while.
Most plumbing pipes are to be found behind the wall. This means that the water will go through the wall, silently wreaking havoc.
If the water leaks for too long, it can reach the highly porous materials that your house is made of.
This can lead to damaging even the entire wood structure behind the wall. If this happens, you will have no other option but to call a licensed plumber.
You wouldn’t want the water to damage the building beyond repair.
Even if nothing terrible like that happens, water leak will cause mold which is bad for your health. When you don’t fix the shower leak quickly, you may end up paying thousands in repairs.
This might even end with cutting and replacing a large portion of the drywall! [2]

Michael Davis is a heating & plumbing expert who currently works as independent contractor in SC. He also writes for Plumbertip.
For almost 10 years he worked on various plumbing tasks across South Carolina.