You have probably at least once experienced a sink clogging up. No one loves when the water just won’t go away, and things become messy. The worst thing about it all is when you realize you don’t know how to remove a bathroom sink stopper!
This has to be done when the water won’t drain at all, as removing it might unblock the pipe.
The next time you end with a clogged sink – don’t panic. Perhaps you can solve everything without spending money on a professional plumber. If you know how to remove a bathroom sink stopper by yourself, you might have found the solution.
In this article, we’ll teach you how to deal with this common issue.
Types of Bathroom Sink Stopper
![]()
Before you learn how to remove a bathroom sink stopper, you should understand there are several types of it. This might impact the removal process.
Overall, there are six bathroom sink stopper types. They are:
- Lift-And-Turn
- Push-And-Pull
- Pop-Up
- Toe-Touch
- Flip-It
- Trip Lever
We’ll briefly touch on all of them, so you can know what makes them different.
Lift-And-Turn
You can recognize this type of stopper by a small knob that is located on the sink stopper’s cap.
This knob serves as a way to open or close the plug, depending on the direction you’re turning it. Lift-and-turn plugs have a setscrew beneath the stopper’s cap that serves for installing. This type of stoppers can be tricky for removal, as unscrewing might be difficult.
This is usually the case if it was overtightened during the installation or if it corroded.
Push-And-Pull
This stopper is rather similar to the lift-and-turn one when it comes to design. However, you close it by pushing it down and open it by pulling it up. Just like the lift-and-turn stopper, it has a screw under the stopper’s cap.
An excellent example of push-and-pool plugs is the Kohler bathroom sink stopper. If your stopper needs replacing, you should check Kohler out for the new one.

Pop-Up
In a way, pop-up bathroom sink stoppers look similar to a bathroom sink pop-up. They have a lever on top of the overflow plate, as well as the spring. This operates the stopper and opens or closes it.
Despite being high in quality, they are a bit complicated to remove and clean while they tend to collect hair. If you need a suitable replacement for it, you should check out the Moen bathroom sink stopper. This brand is known for its high-quality pop-up stoppers.
Toe-Touch
This bathroom sink stopper is also known as a foot-actuated or a toe-tap. It’s very similar to the push-and-pull and lift-and-turn plugs, but it uses a spring. You open it or close it with your foot, instead of with your hands. The removal process is similar to the lift-and-turn one.
Flip-It
This type has a toggle lever right of the stopper’s top that moves from side to side. This is how you close or open it. You can usually install and remove flip-it bathroom sink stoppers without any tools.
Trip Lever
This type of bathroom sink stopper has a lever located at the front part of the tub. It doesn’t have any visible pop-up stopper, just a strainer. Trip lever bathroom sink stopper has a plunger in the overflow pipe. It moves up and down to open and close the drain pipe.
This bathroom sink stopper can be quite challenging to remove, so keep this in mind.
When you know all those different bathroom sink stopper types, you know what to pay attention to. Now it’s time to learn how to remove a bathroom sink stopper for cleaning, repairs, or replacing. [1]
Before you learn how to remove a bathroom sink stopper, you need to prepare the required tools. Here’s what you’ll need:
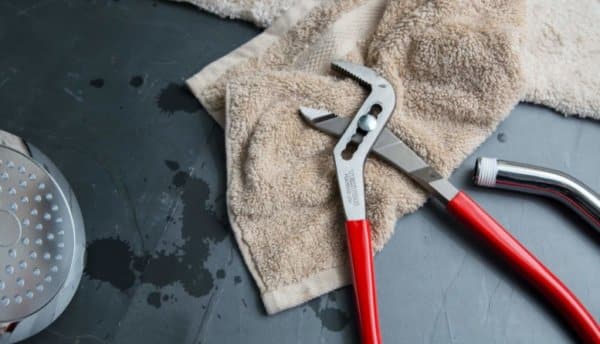
- Wrench or pliers, in case the bathroom sink stopper is too fastened to loosen it with hands.
- Flashlight, so you can see precisely what you’re doing.
- Bucket, in case the sink starts leaking.
And in case you need to clean the bathroom sink stopper, you’ll also need:
- Small brush such as an old toothbrush
- Detergent
- Vinegar, if you want to try to clean it without using chemicals
- Tool for removing hair clogs
- Liquid for cleaning drains, in case the pipe needs some cleaning, too
How to Remove a Bathroom Sink Stopper – Step By Step Process
When you have prepared all your tools, you can begin with removing or replacing bathroom sink stopper. Let’s get started!
Step 1
The first thing you need to do is to see if you can remove the bathroom sink stopper by hand. Sometimes, tools aren’t necessary, so why dirty them if you don’t have to? Take the plug between your finger and try turning it. This might be enough for you to pull it out.
Step 2
If you managed to remove a bathroom sink stopper by hand, skip the next few steps. If this wasn’t possible, you have to change the tactics. Don’t try pulling on the stopper too hard, as this will only damage it.
Instead, you’ll have to go underneath the sink, so prepare for a bit of cleaning. Remove anything from underneath the sink and ensure you have enough space to maneuver freely.
Step 3
Use the flashlight to help you locate the horizontal plunger rod that connects the strap to the stopper. Look for a rod that joins the vertical strap. You shouldn’t have issues identifying it, as it has several holes in it. Then, notice the small metal clip that fixes everything together. Remove it and store it someplace safe so that you can find it later. Also, make sure to remember at which hole the rod was fitted on. Otherwise, you might not know how to put everything together in the end.
Step 4
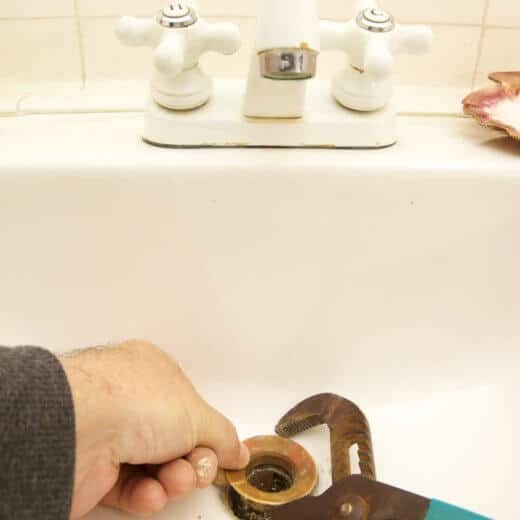
The other side of the detached rod should be connected to a pivot nut that you have to unscrew. This is the moment when you take the bucket and place it under the sink. In case the water comes running down when the nut is unscrewed, this will save you a lot of cleaning work. Then, try to loosen the pivot nut using your hands. If this doesn’t work, use pliers or wrenches.
Step 5
Everything you did so far should be enough to release the bathroom sink stopper. You should be able to pull it out without any issues. Keep in mind that the plug is probably dirty and covered in disgusting gunk. This is an excellent opportunity to clean it up and fix it, in case it is broken.
How To Clean Bathroom Sink Stopper
Now that you know how to remove a bathroom sink stopper, it’s time to clean it. Hair and gunk are common culprits when your sink doesn’t drain the water. Pull out anything that might be stuck in the hole. Use the hair removal tool if there is any hair stuck – and chances are, there will be. Then, clean it with detergent or soak it in a vinegar solution. You could use home remedies for clogged drains too. [2]
This should be enough to make it pristine clean once again. Use that same vinegar solution and hot water to clean the drain, as well. Just pour everything in the gutter and leave it for around ten minutes. After this, you have probably successfully unclogged the pipes.
How to Put Everything Back Together
Once that the bathroom sink stopper is cleaned, it’s time to put everything together. This is more simple than you might think – just do everything in reverse order.
First, return the stopper into the sinkhole. Then, go underneath the sink and tighten the nut. Use pliers or wrench if necessary. Then, reattach the strap and the rod with the clip you have removed before. This should return the sink stopper into place.
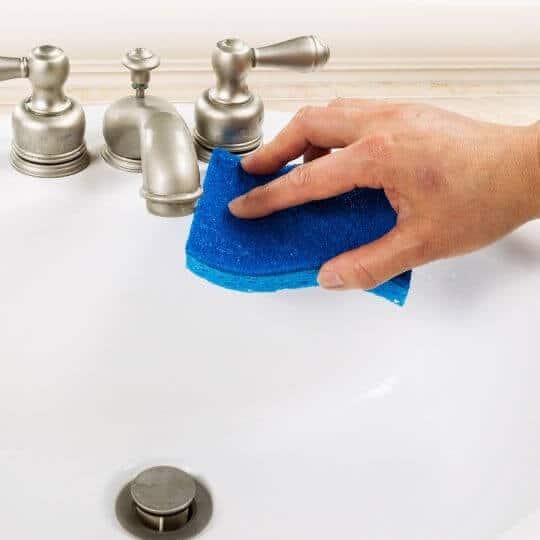
Test the bathroom sink stopper to see if it works as it should have. If it does and the sink is unclogged, good job!
You have successfully cleaned the bathroom sink stopper and unclogged the sink. The last step would be to wipe the floor under the sink, just if the dirty water leaked.
How to Fix Bathroom Sink Stopper
Sometimes, especially if you didn’t return the stopper properly, you might notice it isn’t working as it should have.
A common issue is that your bathroom sink stopper won’t stay up, clogging your sink again. Again, this can happen because of hair or debris on the stopper. Any form of buildup can make the stopper stop working. If this isn’t the case, then the culprit is probably the clevis.
This is especially the case with pop-up models, but even a universal bathroom sink stopper can have this issue.
An excellent way to fix it is to replace the spring clip. When under the sink, look for the spring clip and clevis, or the flat bar, on the stopper. Pinching the clip will release the clevis from the pivot rod. Move the rod to a different hole while you’re replacing the spring clip. Once this is done, assemble everything back into place. Check out if your bathroom sink stopper is now working correctly. If it isn’t, you need to buy a new one and replace it altogether.
A Few Tips and Tricks
- Now that you know how to clean a bathroom sink stopper, you have saved yourself some cash. Here are some additional hints that will help you with this task.
- If you need to replace something, find matching parts. While universal bathroom sink stoppers exist, it’s always better to find the exact replicas. If you don’t understand how to do this by yourself, take the old parts to the hardware store. Professionals working there will know how to help you.
- Keep every part you remove on a tray so that you can find them later. A bathroom sink stopper has several small parts. Don’t lose them.
- Wear rubber gloves, as bathroom sink stoppers tend to be quite dirty. You don’t want to touch all that dirt with your bare hands.
- Don’t wait for the drain to unclog itself. Act on time to prevent further issues. The gunk from the pipes won’t just go away if you don’t do anything about it. If you don’t clean everything early on, you might be in for some considerable trouble.
Bottom Line
When you know how to remove a bathroom sink stopper, you won’t have to waste money on such a mundane task. This easy operation can help you save some cash, as well as time. Just remember to do everything on time.
Clogs can be a cause of many serious issues.
If the sink is still clogged even when you’ve cleaned the stopper and the pipe, you’re out of luck. The problem might be more severe than you’ve initially thought. Contact the local plumber for help.

Michael Davis is a heating & plumbing expert who currently works as independent contractor in SC. He also writes for Plumbertip.
For almost 10 years he worked on various plumbing tasks across South Carolina.