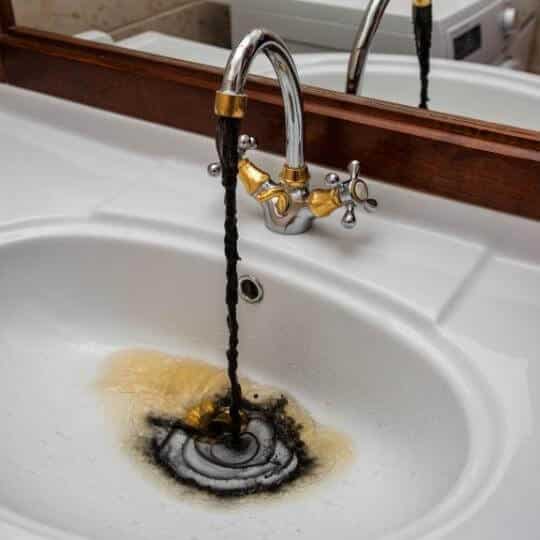
A dripping bathtub tap is more than just a nuisance. A leaking faucet wastes gallons of water, increasing water bills and damaging the inner faucet parts. However, a leaking faucet is usually simple to repair. This article will explain how to fix a leaking bathtub faucet without hiring a plumber.
Most leaks are caused by worn rubber washers, seals, or gaskets in the valve assembly. We’ll teach you how to repair a stem-type valve, typical in two-handle faucets from the past (separate hot and cold). Single-handle faucets are not covered in this article.
How to fix a leaking bathtub faucet
In truth, repairing a bathtub faucet leaking after water is turned off isn’t that difficult, and you should be able to do it yourself with a few basic tools. However, if you want to give it a shot, here’s how to fix a leaking bathtub faucet.
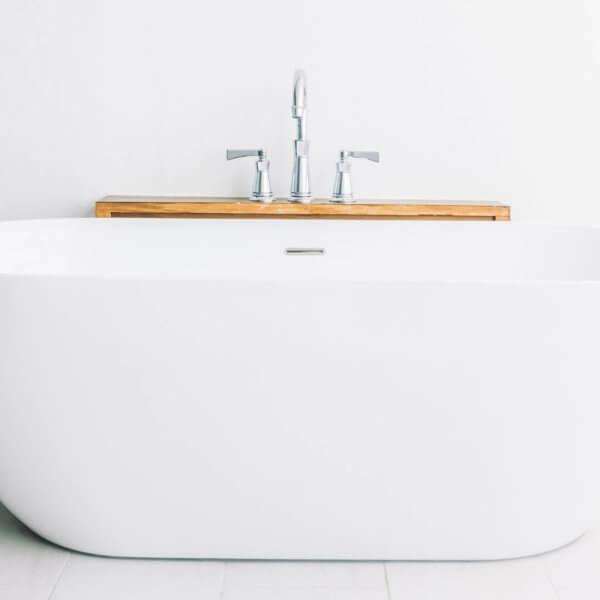
Bathtub Faucets Types
Bathtub faucets exist in various styles. These include single-hole wall-mounted models to three-hole center-set tub faucet spouts.
The water flow from the mixing valve into which both the cold and hot water lines run is controlled by a stem or cartridge. Therefore, it’s critical to identify the sort of bathtub tap you have before attempting to repair it. Bathtub faucets are divided into two categories:
- Bathtub faucet with one handle
- Bathtub faucet with two handles
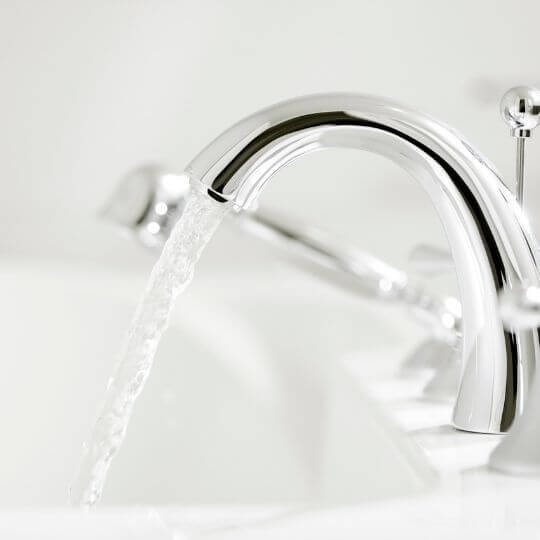
A single-handled bathtub faucet features a single handle used to switch on the water, raise the pressure, and choose between hot and cold water. In addition, they’re usually equipped with anti-scald features and can be utilized with both non-diverter and diverter bathtub chutes.
Bathtub faucets with two handles have one handle for cold water and the other for the heated water. If you don’t know where the trouble is with this sort of faucet, it will take a long time to fix because you’ll have to work on either of them. [1]
Causes of a leaky bathtub faucet
A worn-out washer is the source of a leaking bathtub faucet. The washer creates a watertight seal by pushing strongly against the faucet seat. However, as the tap turns, the friction generated between the faucet seat and the washer wears it down, and the faucet begins to leak.
You have a faulty shower diverter if your bathroom faucet leaks whenever the shower is turned on. A shower diverter is a little knob at the head of the bathtub spout that, when pulled up, shuts the spigot and directs water to the showerhead.
This is how the link appears to work. First, the stem is attached to the faucet handle. The front of the stem is then fastened with a rubber washer. When you move the handle to close the faucet, the stem turns and presses the washer against the faucet seat.
Whenever you need water to flow from the bathtub spout, you spin the faucet handle in the other way, which forces the stem to revolve as well, moving the washer away from the faucet seat in the process.
The repeated rubbing of the faucet seat against the rubber washer wears it down, and the faucet quickly begins to leak. Hot water speeds up the process even faster than cold water.
The leak could be coming from the cartridge or tub faucet stem. When the faucet handle is turned, the faucet stem or cartridge elevates and lowers. This initiates the flow of water. Therefore, if the cartridge or stem fails, the water stream may not be completely blocked.
Old or weak faucet handles can also cause a leaky bathtub faucet. After years of usage, handles can rust and crack, and they may not effectively switch off the water after use.
How to fix a leaking bathtub faucet
The tap washer and the seat must be replaced to remedy a leaking bathtub faucet. It’s critical to replace the seat since a worn washer indicates a metal-to-metal connection between the seat and stem, which can cause the seat to burr. A faucet seat with burrs will rip a new washer, causing the bathtub to leak.
Step 1: Collect the parts, tools, and materials you need
To repair a leaky bathtub faucet, you first have to ensure all of the necessary replacement parts are available. Most bathtub plumbing issues can be resolved with replacement parts found at home centers and hardware stores. A plumbing parts distributor will have a considerably greater selection and can special-order goods that are difficult to come by.
Since numerous bathtub faucet replacement parts are available, you will need to bring your old components to the store to find the most suitable for fixing a leaky bathtub faucet.
Consider replacing the whole faucet if the valve is heavily rusted or its finish is fading. Make minor plumbing repairs yourself to save money. With simple materials and knowledge, these plumbing repairs are fully do-it-yourself.[2]
You will need the tools and supplies listed below:
- Plumber’s grease
- Stem valve repair components
- Adjustable wrench
- Bath socket wrench
- Handle puller
- Seat wrench
- Utility knife
Step 2: Turn off the water main.
The second step is to turn off the bathroom’s water supply. This shuts off the water supply to the house completely. The shut-off valve is usually situated in the house’s basement or crawlspace. Stop the water flow by turning the shut-off valve clockwise.
The shut-off valve might well be positioned outdoors where the city water meter is installed in many homes. Use a torque wrench to screw the valve shut if it hasn’t been turned in years.
Turn the knob (or handles) to the “on” position and drain any excess water from the pipes into the bathtub once the water flow has been halted.
Step 3: Disconnect the Faucet Cap
The lid covering the faucet lever screw must be pried off next. A little slotted screwdriver or pocket knife can be used for this.
To remove the cap, open the tap to empty any water (as if you were running it), and then pry it off with the chosen tool. Keep it in a safe place where you’ll remember where you put it.
Step 4: Remove the Screw from the Handle
After removing the cover, look for the screw that keeps the lever in place within the faucet handle. This must now be removed using a screwdriver. To avoid losing the screw, unscrew it and store it with the cap.
Step 5: Take the Handle Off
You can then detach the handle after removing the screw. This part might be challenging based on how old the faucet is, as rust and water accumulation can lead to the stem’s handling fusing.
Don’t force it if it refuses to come off; you could shatter it. Heating it with a hot blast using a hairdryer or splashing hot water over it are two alternatives that may assist. If it still doesn’t move, you may need to use a handle puller, a special tool developed for this purpose.
Step 6: Remove the Escutcheon
The escutcheon, or plate covering the hole in the wall, must be removed next. Depending on the type of faucet, you might have to unscrew it or twist it off.
Step 7: Disconnect the stem assembly
You may now access the stem assembly after removing the escutcheon. This is the area where the leak must be repaired. Remove the stem assembly with an adjustable wrench.
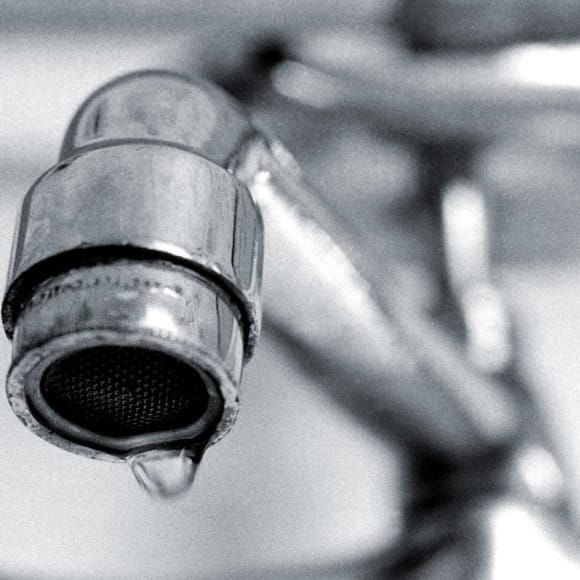
Step 8: Examine the Washer
The commonest cause of water leaking from tub spout when shower is off is the wearing out of the washer, which needs replacing. When removing the stem assembly, you need first to inspect the end washer. If it has to be changed, it should be clear – an old washer might have hardened and distorted, which is what allows the water to flow through.
Step 9: Replace the Washer
The washer is the exposed rubber portion at the topmost part of most tap stems or cartridges. Because many washers are made for particular models of stems or cartridges, you may need to have it tested to ensure that you get a compatible replacement with the faucet parts.
If the washer appears cracked or worn, it should be replaced. To unscrew the screw that holds the washer together, use a ratchet wrench. Then, disconnect the washer and replace it before replacing the screw. If your tub tap continues to leak after replacing this part, you may have to replace the stem.
Step 10: Replace the tap stem
If changing the washer does not stop the leak, it could be the stem or cartridge. In case the cartridge or stem is the cause of the problem, follow these methods to prevent it from leaking.
Remove any rust, wax, or caulk from the foundation. To release the bolts that keep it together, use an adjustable wrench. If the bolts are in the wall, remove them with a socket wrench.
Take out the stem and replace it with fresh bolts in the fitting. Because many stems or cartridges are only compatible with certain types of faucets, you may need to have them tested to ensure you get a replacement compatible with the tap parts.
If the bath faucet continues to drip after changing the handle, washer, and stem, the whole bathtub spout may need to be replaced.
Step 11: Look for any damage to the seat
Another explanation for a leak could be that the seat is ruined. The seat is the section of the washer that comes into contact with it, and it can be damaged either by wear or corrosion.
A leaking seat can produce a leak in and of itself and swiftly damage the replacement washer you just installed, causing the leak to recur. Therefore, you should inspect the seat for any visible damage before replacing the stem component with the new washer.
Step 12: If necessary, replace the seat
If there is any sign that the seat is damaged, it must be removed and replaced. You’ll need a seat wrench to detach the seat, a particular tool designed for the job.
Step 13: Reconnect the components
It’s time to put things back together once you’ve changed the washer and examined and restored the seat. First, change the stem component, secure it with the variable wrench, repair the escutcheon, and tighten it back into place as necessary, followed by the handle.
You can reinstall the cap that protects it once the handle is properly secured and fastened back into place. Next, switch the water on and test the faucet to verify it is working properly. If the water is flowing properly and the tap is no longer leaking, you have accomplished the repair work.
How to change the spout on a faucet
Another cause of a leaky faucet could be a weak seal on the threading of a short section of pipe going to the spout.
The faucet spout must be removed first. The spout is either a set-screw spout or a thread-on spout that may be screwed on and off. It’s a set-screw spout if there’s a little hexagon screw under the spout. Loosen the screw with a tool or socket wrench to remove the spout.
For simpler removal, score the adhesive where the bathtub wall and faucet meet using a utility knife. Then, with a wrench, detach the length of the pipe known as a pipe nipple. Wrap plumber’s tape or Teflon tape around the threads on both ends of the nipple.
Insert the nipple into the wall’s 90-degree elbow pipe. Tighten the nipple by turning it clockwise. Replace the spout on the faucet. To wash out any debris, turn on the water. Between the wall and faucet spout, apply a new bead of sealant.
How to Repair a Faucet in a Bathtub without Switching Off the Water
It is possible to repair or change a bathtub tap without shutting down the entire house’s water supply. This, however, will be determined by the plumbing type you have installed.
Remove the handle and top plate from your faucet. Look for two screws on either side of the pipes that join at the mixing valve (cold and hot). Turn these nuts clockwise with a screwdriver to shut off the flow to the valve. You can now begin working on your faucet. This is the only technique to fix a bathtub tap without shutting off your entire house’s water supply.
Cost to fix leaky bathtub faucet
A bathtub faucet costs on average $350 to change or repair, with a usual range of $300 to $400. However, a complete faucet replacement can cost up to $1,000, while a simple repair can cost as little as $25.
A bathtub tap may appear to be just another component, but it comprises highly engineered components that work differently from a standard faucet to allow more water flow. As a result, many people shopping for bathtub taps for the first time are frequently surprised by the cost. If you need to fix or change the tap on your old bathtub, you might be curious how much it would cost.
Labor Costs for Bathtub Tap Repair vs Replacement
A plumber costs between $85 and $105 per hour for this job type. Installing a faucet can be as low as $300 to $400 if minimal work is required. However, suppose major plumbing work is needed, such as removing the whole installation and repairing some of the plaster around it. In that case, the project will take approximately 7 hours and cost $600 to 750 dollars.
On the other hand, repairing a faucet usually costs the same as paying a plumber by the hour. Plumbers charge between $45 and $200 per hour, so a basic repair could cost anywhere from $45 to $100. Always inquire about any additional costs or flat fees which may increase your ultimate bill, regardless of the cost. [3]
Many service providers impose flat prices plus a servicing or truck fee. While this may appear to be practical, it can quickly become costly. When booking maintenance with a contractor you’re unfamiliar with, ask about these fees. It can be surprising when a contractor informs you it’ll cost $175 to visit your home to give you repair alternatives.
Below is a summary of the repair vs. replacement costs for certain tasks.[4]
| Type of task | Average cost of replacement (Labor included) ($) | Average cost of repair (Labor included) ($) |
| Cartridge | 100-250 | 65-220 |
| Washer | 100-250 | 50-100 |
| Head | 100-250 | 50-150 |
| Diverter | 150-300 | 5-150 |
| Handle | 150-350 | 50-200 |
| Valve | 150-350 | 75-250 |
| Corrosion | – | 50-200 |
How to fix a leaking bathtub faucet: DIY is the way to go
Hiring a plumber for such a simple task may be a waste of money. However, while you may have to spend the cash on specialized tools such as the seat wrench, it is still less expensive than hiring a professional, plus you will always have the item on hand if you need it.
Repairing a leaking faucet is one of the easiest plumbing projects there is. If you’re feeling ambitious and up for a challenge, you should be able to handle it on your own without too many issues if you follow our step-by-step tutorial.
Related: Bathtub Won’t Hold Water

Michael Davis is a heating & plumbing expert who currently works as independent contractor in SC. He also writes for Plumbertip.
For almost 10 years he worked on various plumbing tasks across South Carolina.