Stuck sink stoppers are troublesome. It’s one thing to be stuck open since it allows the water to drain, but it’s a very different story when it’s stuck closed. Even with just a few hand washes, filthy, sudsy water soon fills your sink. When a drain is stuck shut for an extended period, it can render your sink nearly unusable. You might not even wash your hands or brush your teeth without filling the sink. Because you can’t drain it due to the blocked stopper, you might need to know how to fix bathroom sink stopper stuck shut.
Fortunately, unsticking a sink stopper is usually a straightforward process. Continue reading if your sink drain stopper is stuck in the closed position for a guide to repairing your stuck sink stopper.
How do bathroom sink stoppers work?
Bathroom sink stoppers are simple devices with a limited number of moving parts. When something goes wrong, it’s usually due to a broken component. Fortunately, bathroom sink stopper stuck issues are simple to identify and repair with only a few tools. Most homeowners are capable of performing these fixes.
Getting beneath the sink and behind the drainpipe to access the mechanics is the most challenging part of replacing a broken bathroom sink stopper. If your bathroom sink cabinet is like most, clearing space beneath the sink may take longer than repairing. A simple grasp of how most bathroom sink stoppers work will help you locate the issue.
Pop up sink plug mechanism
There are only three pieces to most bathroom sink stopper devices. Yet, these three pieces work together to move the sink stopper up and down at the touch of a finger. It is an efficient system when everything is working well. [1]
Let’s take a look at these components and their roles in the operation of your bathroom sink stopper.
1. The Pushrod
The drain mechanism is usually operated by a pushrod positioned at the rear and on top of the faucet. This pushrod serves as your connection to drain operations. All of the activity begins when the button on the pushrod is pressed.
Pressing the pushrod button usually lifts the bathroom sink drain stopper, allowing the water in the sink to drain. The operation is reversed by pulling up on the pushrod button, and the drain is closed, preventing water from entering the drainpipe.
2. The Lever
The action lever is connected to the pushrod under the sink. For example, a small metal strip or a metal rod might be used as the action lever. A thumbscrew connects one end of the lever to the pushrod. The level’s other end is located inside the drain pipe.
Some individuals are perplexed about how the lever inside the drainpipe allows water to leak beneath the sink. This issue is addressed in a variety of ways by plumbing manufacturers. A ball and cap is the most typical method. The cap tightens against the drainpipe and pulls the ball close to the aperture, and the ball washer fits inside the drainpipe. There are other kinds as well. Nevertheless, they all work similarly.
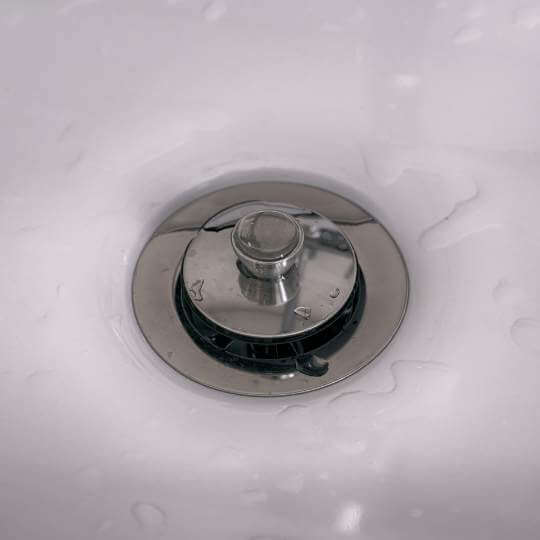
3. The Popup Drain Plug
The drain plug itself is the third component of your bathroom sink drain plug. A rubber gasket is hidden beneath a lip on the plug, which fits tightly in the drain opening from above. Everything below the rubber gasket is referred to as a tailpiece.
A ring or hook is located at the bottom of the tailpiece. This ring or pin engages the end of the lever inside the drainpipe. The lever lifts the drain plug when you press down on the pushrod. The drain stopper is pulled down when you pull up on the pushrod, and the gasket is sealed into the drain flange. Until something doesn’t work, it’s simple and elegant.
Bathroom Sink Stopper Stuck
Any moving set of pieces has the potential to fail. When those metal parts are exposed to water, the chances of corroding increase even more. Drain plugs for bathroom sinks are no exception. As a result, some manufacturers are phasing out metal components in plastic parts. Plastics solve the corrosion problem, but they aren’t as long lasting as metal.[2]
Corroded Pushrods
The faucet’s pushrod must travel through a hole in the faucet below the sink. The pushrod is naturally exposed to a lot of water in this position. As a result, the pushrod can rust if it isn’t used regularly, such as in a guest bathroom. In addition, corrosion can cause the pushrod to become stuck in the faucet’s channel.
Bad Connections
A bathroom sink plug assembly has two essential connections. For the assembly to move the drain stopper up and down in the drain, these connections must operate. The plug becomes stuck in the open or closed position if a link is loose or a part fails.
A bathroom sink drain plug can stop working due to various faults with this connection.
- If the thumbscrew becomes loose, the connection may slip.
- The lever has a chance of rusting and breaking.
- The pushrod could snap.
This connection, in any case, must be secure for the drain plug assembly to function correctly.
Inside the Drain
The drain plug must engage the lever inside the drain to work effectively. Short of disassembling the drain, figuring out how this connection works. The following are the most common connections between the sink stopper and the lever:
- A hole in the bottom of the stopper’s tailpiece into which the lever can be slid.
- A ring on the lever engages a hook on the tailpiece.
- Between the lever and the tailpiece, there is a ball and capture joint.
The key to removing the drain stopper from the lever is determining which joint is in the drainpipe. The drain plug assembly may only work in one way if this joint is cracked or rusted. After that, you might be able to shut the door.
When the spring doesn’t spring
Almost every problem with a push/push bathroom sink drain plug is caused by something interfering with the spring. For example, hair, foreign particles, rust, or anything else that goes down the drain might cause the bathroom sink stopper to become stuck.
How to fix bathroom sink stopper stuck
Clear away everything in the cupboard beneath the sink as the first step in this process. After that, you’ll have to get up and personal with the stopper mechanisms behind the drainpipe, and working around odd stuff in the cabinet isn’t ideal. As a result, get everything out of your desk that you can.
Examine the clip
One of the possible causes of your sink’s malfunction is the spring clip. Crawl beneath your sink and double-check that all necessary components are still attached. Reattach it if it has come loose. It’s preferable to replace it with the appropriate replacement part if it appears damaged or worn.
Pivot Rod Problems
Steel is used in several horizontal pivot rods. Steel, unfortunately, is prone to rust, especially if your sink has been leaking. Water exposure may cause the steel to rust, weakening it and preventing it from performing as intended. Replacement parts are required if the pivot rod has rusted away. [3]
You can buy the steel replacement part separately if you want; however, steel doesn’t last very long in plumbing systems. Brass is a fantastic substitute. You should choose a brass assembly if and when you decide to replace the pop-up drain assembly.
Disconnected parts can also cause pop-up stoppers to become stuck open; if this is the case, double-check that all components are connected and moving as they should.
How to fix a pop up sink plug
Pop-up plugs having a damaged end do not connect to the mechanism as they should, rendering the tool completely unusable. If everything else under the sink appears to be in working order and all components are connected, the issue may be with the plug. [4]
Under the sink, look for the end of the pop-up plug. At the base of the stopper, a flange is a thin plastic strip. The pop-up assembly must be replaced if the tailpiece is broken.
Fix the Problem
You may proceed with correcting the problem once you’ve established what’s causing your push-to-pop-up sink stopper to stick down. As long as the separate pieces are still in good condition, they are quick and uncomplicated. Next, reattach them to their proper locations and test the mechanism to ensure it functions properly.
Remove the old assembly if you decide to replace the entire pop-up body. Insert the new stopper into the drain to complete the installation. Place the pivot rod into the drainpipe after sliding the clevis above the stopper rod.
Stiffen the locking nut just enough to secure the pivot rod, but not too much. Tighten the clevis screw after that. Finally, examine the work with the lift rod to make sure all of the moving elements are in place.
Now try to fill the sink with water to ensure you have a good seal. If the sink doesn’t hold water because the seal isn’t working correctly, adjust the retention nut and clevis until it does.
How to remove stuck bathroom sink drain
You’ll need a wrench or pliers, detergent, a brush, a flashlight, a bucket, drain cleaner liquid, a hair clog removal tool, and vinegar before attempting to remove the bathroom sink stopper. To remove the bathroom sink stopper stuck, follow the steps below.
Step 1: Attempt to remove the stopper by hand.
Certain stoppers can be removed by hand. To turn the plug, raise it and turn it. This may be all you’ll need to get it out.
Step 2: Take everything out from under the sink.
If you can’t get the stopper out, you’ll have to go underneath the sink to release it, so clear out everything that’s stored beneath the sink to make room for you to work.
Step 3: Determine the location of the horizontal plunger rod.
Put your head under the sink with your flashlight. But, first, the horizontal rod that links the stopper to the strap must be located. It’s a rod that’s connected to the vertical strap, a piece of metal with holes in it, and it should be easy to spot.
Step 4: Find the clip that connects the rod with the strap.
You’ll notice that the rod and the metal strap it’s attached to are held together by a bit of metal clip once you’ve located them. Detach the hook from the rod and strap so that they are no longer attached, and keep it somewhere safe so that it does not get lost.
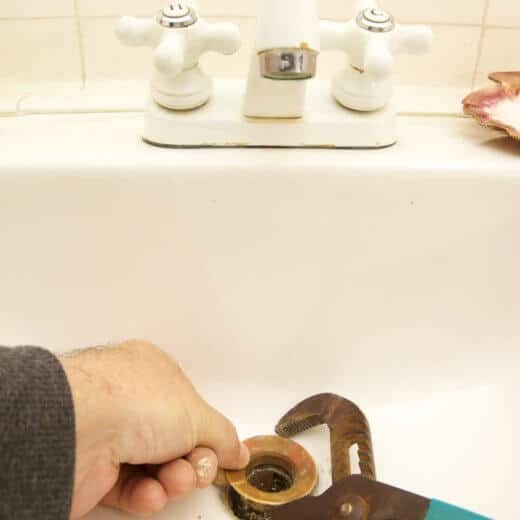
Step 5: Remove the pivot nut by unscrewing it.
The pivot nut should be attached to the opposite end of the rod you have separated from the strap, which you must now unscrew. Consider putting a bucket under the sink to catch any water leaks as you remove this nut.
Try loosening the nut using your hands while the bucket is in place. If it does not come loose on its own, you’ll have to use the pliers or wrench.
Step 6: Take the stopper out.
You should be able to take the stopper out of the sink by hand now that it is no longer stuck. But, while it’s out, you might as well clean it well, so soak it in the detergent and vinegar, and warm water, before replacing it.
Step 7: Using the hair remover, remove the hair.
You should pull any hair and muck out of the opening before replacing the stopper. For this, use the hair remover tool; you should be able to take most of the trapped hair and other junk out of the sink with ease.
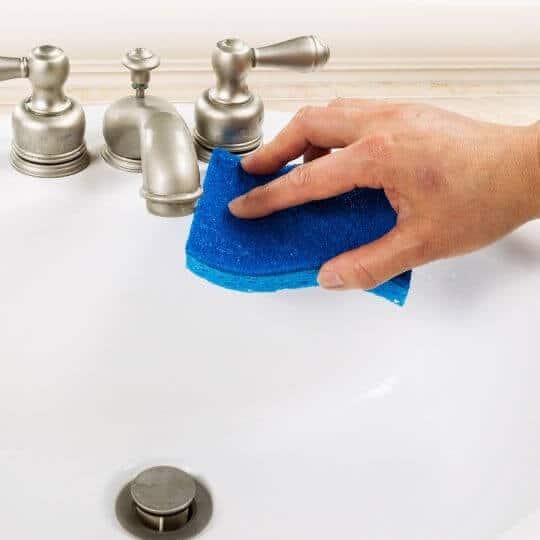
Step 8: Use a drain-cleaning product to clean it out.
This is an excellent time to clean the drainpipe thoroughly before reinstalling the stopper, especially if it was previously blocked. Follow the directions on your drain cleaning product, pour it down the drain, then walk away.
After it’s been in there for a while – at least ten minutes – flush it out by running hot water down the sink.
You should be able to effortlessly drain the water, indicating that you have effectively unclogged your clogged drain.
Step 9: Replace everything in its original location.
After you’ve wiped everything up and cleared the drain, it’s time to put everything back together again, so reverse the process. To begin, replace the sink stopper in the hole. Next, reinstall the nut under the sink and tighten it with the wrench or pliers as needed.
Reattach the strap to the rod using the clip you removed earlier once the nut is tightened. Test the stopper once this is completed. You’ve successfully fitted it back into place if it moves up and down as it should when you push and pull the level. To conclude, return everything to the sink and wipe everything clean with a cloth – and you’re done!
Keep your stuck bathroom sink stopper working
Maintaining the functionality of your bathroom sink drain is a simple fix that may save you a lot of trouble. The majority of the repairs are straightforward. This task does not necessitate a large number of tools. In most cases, a bathroom sink drain repair takes less than an hour.

Michael Davis is a heating & plumbing expert who currently works as independent contractor in SC. He also writes for Plumbertip.
For almost 10 years he worked on various plumbing tasks across South Carolina.